
Lately, I've had a nagging interest in working on a minimal OS again.
Philipp Oppermann's guide to Writing an OS in Rust is an absolutely fantastic place to start and I encourage anyone interesting in programming to go through it.
As indicated above, I've been hankering for something really low level but, truth be told, I didn't really care for Rust. I understand that its borrow-checker is its secret sauce and what makes it a better suited language for writing reliable programs. But I really don't like the added complexity. Consider the fact that there are an overly unhealthy number of StackOverflow questions asking how to implement linked lists and other trivial data structures in Rust. I digress, I don't want to make this a bash Rust post - this post is not that.
What I do want to go over is getting something in Zig running on "bare metal".
In computer science, bare machine (or bare metal) refers to a computer executing instructions directly on logic hardware without an intervening operating system.
There seems to be a fair amount of interest in doing this but mostly centered around writing something for the Raspberry Pi [1] or other micro-controllers [1, 2]. That might be something I look in to later but for now I'd really like to mostly follow along with Oppermann's blog guide but in Zig.
To do that, seemingly I need to compile a freestanding Zig binary and then extend it into a Zig kernel capable of being ran by some bootloader.
Unsurprisingly, I'm not the first person to try this [1, 2, 3] so there was a bit of a path to follow.
First things first, let's work on compiling a free-standing Zig binary. We can actually accomplish that directly by passing some arguments to zig.
Zig is very much a growing language right now with a fair number of breaking changes happening with every version. I'm going to be using 0.8.1 and I'm not going to tell you why - just yet anyway.
Ok, fine, it's because this is a work in progress and that's the latest version I've gotten things to work with. Seemingly, everything here should work up until 0.10.0 as Async functions and support for overriding the stack pointer is missing in 0.11.0 and beyond until...it's readded. ¯\_(ツ)_/¯
zig build-exe freestanding.zig -target i386-freestandingA Simple Freestanding Binary
Let's try that with a simple Zig program.
freestanding.zig
const std = @import("std");

pub fn main() void {
    std.debug.print("Hello, world!\n", .{});
}
And it compiles but with a linker warning...
➜  zig build-exe src/freestanding.zig -target i386-freestanding
warning(link): unexpected LLD stderr:
ld.lld: warning: cannot find entry symbol _start; not setting start address
There's not a lot of documentation for the freestanding targets but we can surmise that a freestanding targeted binary requires a _start method rather than relying on main. This is probably because of the lack of an initial runtime (crt0). ¯\_(ツ)_/¯
freestanding.zig
const std = @import("std");

export fn _start() void {
    @call(.{ }, main, .{});
}

pub fn main() void {
    std.debug.print("Hello, world!\n", .{});
}
Which compiles with
➜  zig build-exe src/freestanding.zig -target i386-freestanding
/usr/local/etc/zig/0.8.1/lib/std/fs/file.zig:20:15: error: container 'std.os' has no member called 'fd_t'
    handle: os.fd_t,
              ^
/usr/local/etc/zig/0.8.1/lib/std/debug.zig:67:22: note: referenced here
    const stderr = io.getStdErr().writer();
                     ^
This is even less obvious but it's because we can't use the standard library with a freestanding binary!
freestanding.zig
const std = @import("std");

export fn _start() callconv(.Naked) noreturn {
    @call(.{ }, main, .{});
}

pub fn main() void { }
If you read through the Rust variant then you know that we mark the _start method with export ensuring it uses the C calling convention. You're also aware that the _start method is called by the system and isn't expected to return anything so we loop instead and mark the method as noreturn. Finally, we also mark the method as having a Naked calling convention which "makes a function not have any function prologue or epilogue".
If you didn't do theexport,noreturn, andcallconv(.Naked)stuff above compilation still succeeds. You'll get anld.lldlinker warning saying it couldn't find_startand defaults to 0x100000. Then when you eventually get a kernel image nothing happens.
Coincidentally, if you only useexportbut skip the rest, things seemingly work. But we'll blinding follow along the path laid out before use [1, 2, 3] making sure we're tidy and abiding system call etiquette.
And this finally compiles successfully!
Ok, that wasn't so bad...but we can't run it on MacOS?
➜  ./main
zsh: exec format error: ./main
Not surprising actually, given the binary we built targeted an i386 system and is an ELF file. ELF is a common executable file format used by a number of types of systems but, if you're running MacOS, you'd need a Mach-O formatted file.
You can experiment a little with this by specifying different targets and inspecting the type of file.
➜  zig build-exe src/freestanding.zig -target i386-freestanding
➜  file kernel
kernel-mb1: ELF 32-bit LSB executable, Intel 80386, version 1 (SYSV), statically linked, with debug_info, not stripped
➜  zig build-exe src/freestanding.zig -target x86_64-macos
➜  file kernel
kernel: Mach-O 64-bit executable x86_64
A Runnable Kernel
We have a freestanding, ELF-32 formatted binary but we can't do anything with it.
That's not true! We can turn it into a "kernel" by making it multiboot compliant so we can run it with QEMU directly via -kernel which supports loading mutliboot1 compliant kernels.
Note: QEMU's -kernel doesn't support loading multiboot2 compliant kernels.linker.ld
ENTRY(_start)

SECTIONS {
    . = 1M;

    .text : ALIGN(4K) {
        KEEP(*(.multiboot))
        *(.text)
    }

    .rodata : ALIGN(4K) {
        *(.rodata)
    }

    .data : ALIGN(4K) {
        *(.data)
    }
}
This linker script forces the first section to be the multiboot1 header followed by executable program code. Next we specify sections for read-only data and mutable data. See this most thoroughly commented linker script for an example script with great documentation.
And we need to update freestanding.zig to a mutliboot compliant kernel.
kernel.zig
const ALIGN = 1 << 0;
const MEMINFO = 1 << 1;
const MB1_MAGIC: u32 = 0x1BADB002;
const FLAGS: u32 = ALIGN | MEMINFO;

const MultibootHeader = packed struct {
    magic: u32 = MB1_MAGIC,
    flags: u32,
    checksum: u32,
};

export var multiboot align(4) linksection(".multiboot") = MultibootHeader {
    .flags = FLAGS,
    .checksum = @intCast(u32, ((-(@intCast(i64, MB1_MAGIC) + @intCast(i64, FLAGS))) & 0xFFFFFFFF)),
};

export fn _start() callconv(.Naked) noreturn {
    @call(.{ }, main, .{});
    while (true) {}
}

pub fn main() void { }
There's a lot going on here but it's all specific to making the "kernel" (come on, it's not doing anything) multiboot1 compliant.
We create some constants, a packed struct to define the layout of the data, and then an exported variable, multiboot, containing our actual multiboot1 data.
We annotate the exported variable with align(4) and linksection(".multiboot") which lets the linker know we want the section 4-byte aligned and associated with the .multiboot section in the linker script.
And that's that! We can then compile the freestanding, i386 targeted, multiboot1 compliant binary and run it with QEMU!
➜  zig build-exe src/kernel.zig -target i386-freestanding -T src/kernel.ld
➜  qemu-system-x86_64 -kernel kernel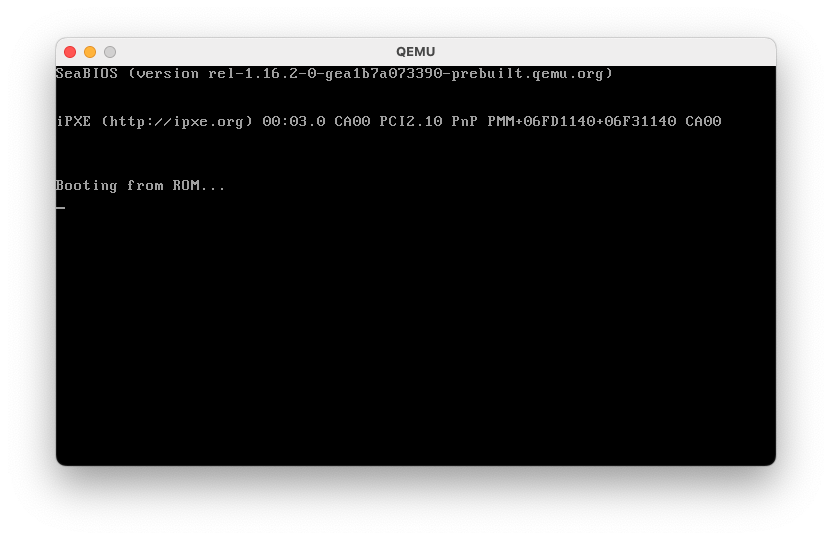
Erm... Did it actually do anything? Yes! Yes it did! It didn't fail to launch! Ok... but let's make it at least print hello world like all of the other guides do.
A Useful (?), Runnable Kernel
Making our "kernel" print to the screen is a lot harder than just using std.debug.print because we don't have access to the standard library. So...we'll have to roll our own. Surprisingly, it's not too terribly difficult because we can get direct access to the VGA text buffer [1, 2].
Here's a heavily inspired (mostly copied) console.zig which lets you change colors and print text.
console.zig
const fmt = @import("std").fmt;
const mem = @import("std").mem;
const Writer = @import("std").io.Writer;

const VGA_WIDTH = 80;
const VGA_HEIGHT = 25;
const VGA_SIZE = VGA_WIDTH * VGA_HEIGHT;

/// Enumeration of VGA Text Mode supported colors.
pub const Colors = enum(u8) {
    Black = 0,
    Blue = 1,
    Green = 2,
    Cyan = 3,
    Red = 4,
    Magenta = 5,
    Brown = 6,
    LightGray = 7,
    DarkGray = 8,
    LightBlue = 9,
    LightGreen = 10,
    LightCyan = 11,
    LightRed = 12,
    LightMagenta = 13,
    LightBrown = 14,
    White = 15,
};

/// The current cursor row position.
var row: usize = 0;

/// The current cursor column position.
var column: usize = 0;

/// The current color active foreground and background colors.
var color = vgaEntryColor(Colors.LightGray, Colors.Black);

/// Direct memory access to the VGA Text buffer.
var buffer = @intToPtr([*]volatile u16, 0xB8000);

/// Create a VGA color from a foreground and background Colors enum.
fn vgaEntryColor(fg: Colors, bg: Colors) u8 {
    return @enumToInt(fg) | (@enumToInt(bg) << 4);
}

/// Create a VGA character entry from a character and a color
fn vgaEntry(uc: u8, newColor: u8) u16 {
    var c: u16 = newColor;
    return uc | (c << 8);
}

/// Set the active colors.
pub fn setColors(fg: Colors, bg: Colors) void {
    color = vgaEntryColor(fg, bg);
}

/// Set the active foreground color.
pub fn setForegroundColor(fg: Colors) void {
    color = (0xF0 & color) | @enumToInt(fg);
}

/// Set the active background color.
pub fn setBackgroundColor(bg: Colors) void {
    color = (0x0F & color) | (@enumToInt(bg) << 4);
}

/// Clear the screen using the active background color as the color to be painted.
pub fn clear() void {
    mem.set(u16, buffer[0..VGA_SIZE], vgaEntry(' ', color));
}

/// Sets the current cursor location.
pub fn setLocation(x: u8, y: u8) void {
  row = x % VGA_WIDTH;
  column = y & VGA_HEIGHT;
}

/// Puts a character at the specific coordinates using the specified color.
fn putCharAt(c: u8, newColor: u8, x: usize, y: usize) void {
    const index = y * VGA_WIDTH + x;
    buffer[index] = vgaEntry(c, newColor);
}

/// Prints a single character
pub fn putChar(c: u8) void {
    putCharAt(c, color, column, row);
    column += 1;
    if (column == VGA_WIDTH) {
        column = 0;
        row += 1;
        if (row == VGA_HEIGHT)
            row = 0;
    }
}

pub fn putString(data: []const u8) void {
    for (data) |c| {
        putChar(c);
    }
}

pub const writer = Writer(void, error{}, callback) {
    .context = {}
};

fn callback(_: void, string: []const u8) error{}!usize {
    putString(string);
    return string.len;
}

pub fn printf(comptime format: []const u8, args: anytype) void {
    fmt.format(writer, format, args) catch unreachable;
}
Then let's update kernel.zig to display "Hello, world!".
kernel.zig
const console = @import("console.zig");

const ALIGN = 1 << 0;
const MEMINFO = 1 << 1;
const MB1_MAGIC: u32 = 0x1BADB002;
const FLAGS: u32 = ALIGN | MEMINFO;

const MultibootHeader = packed struct {
    magic: u32 = MB1_MAGIC,
    flags: u32,
    checksum: u32,
};

export var multiboot align(4) linksection(".multiboot") = MultibootHeader {
    .flags = FLAGS,
    .checksum = @intCast(u32, ((-(@intCast(i64, MB1_MAGIC) + @intCast(i64, FLAGS))) & 0xFFFFFFFF)),
};

export fn _start() callconv(.Naked) noreturn {
    @call(.{ }, main, .{});
    while (true) {}
}

pub fn main() void {
    console.setColors(.White, .Blue);
    console.clear();
    console.putString("Hello, world");
    console.setForegroundColor(.LightRed);
    console.putChar('!');
}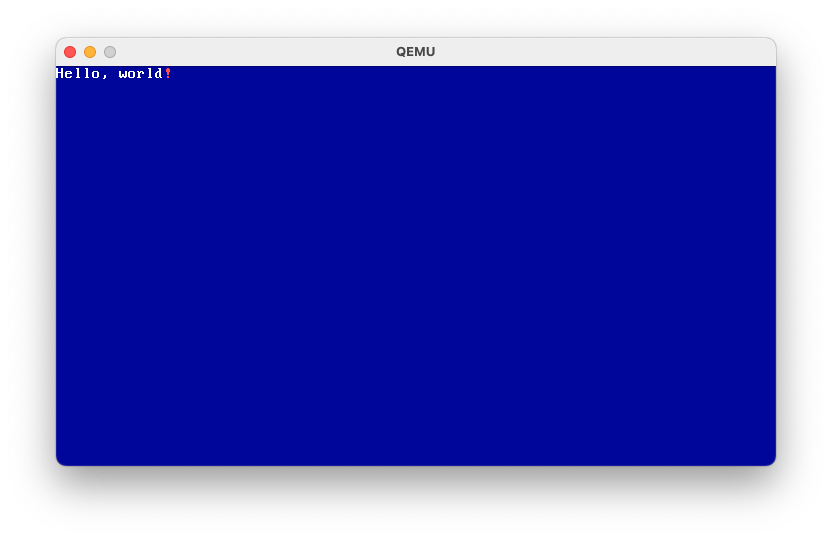
Viola! We have a runnable "kernel" (it's not really a kernel, right? It doesn't do anything useful). But we should probably make it bootable.
A Useful (?), Bootable Kernel
The last (lol) thing we need to do is make this baby bootable!
We can use grub-mkrescue to build an ISO that we can then use to boot QEMU from.
If you're using MacOS there are some dependencies you'll need to get set up. Nothing too crazy, building and "installing" objconv and GRUB2 from source, and installing QEMU.
objconv is surprisingly straight forward:
cd ~/github
git clone git@github.com:vertis/objconv.git
g++ -o objconv -O2 src/*.cpp
sudo ln -s ~/github/objconv/objconv /usr/local/bin/objconv
GRUB2 is less so but their documentation is fine.
cd ~/github
git clone git://git.savannah.gnu.org/grub.git
cd grub
./boostrap.sh
./autogen.sh

# Need to be able to build i386 ELF targeted C things
brew tap homebrew/core
brew install i386-elf-binutils i386-elf-gcc
mkdir build
cd build
../configure --disable-werror TARGET_CC=x86_64-elf-gcc TARGET_OBJCOPY=x86_64-elf-objcopy \
	TARGET_STRIP=x86_64-elf-strip TARGET_NM=x86_64-elf-nm TARGET_RANLIB=x86_64-elf-ranlib --target=x86_64-elf

# MacOS has a super old version of awk
brew install gawk
sudo ln -s /opt/homebrew/bin/gawk /usr/local/bin/gawk
export PATH="/usr/local/bin/gawk:$PATH"

make
sudo make install

# GRUB2 needs xorriso (now called mkisofs)
brew install xorriso
Phew, with that out of the way let's install QEMU.
brew install qemuAlright, now we need a GRUB2 configuration file:
grub.cfg
menuentry "A Useful (?), Bootable Kernel" {
	multiboot /boot/kernel
}
Ok, now we can finally create our ISO file manually (ick).
mkdir -p iso_dir
mkdir -p iso_dir/boot/grub/

zig build-exe src/kernel.zig -target i386-freestanding -T src/kernel.ld
cp kernel iso_dir/boot/
cp grub.cfg iso_dir/boot/grub/

grub-mkrescue -o kernel.iso iso_dir
And then all we have to do is launch QEMU!
qemu-system-x86_64 -cdrom kernel.iso -debugcon stdio -vga virtio -m 4G -machine "q35" -no-reboot -no-shutdown
There's more to do here - specifically around automating the entire build process using Zig's build tooling. But I'll leave that for next time.