<?xml version="1.0" encoding="utf-8"?>
<feed xmlns="http://www.w3.org/2005/Atom" xmlns:media="http://search.yahoo.com/mrss/">
    <title>Austin Hanson</title>
    <link href="https://austinhanson.com/feed.xml" rel="self" />
    <link href="http://127.0.0.1:4381/austin-hanson" />
    <updated>2026-10-15T17:06:33-05:00</updated>
    <author>
        <name>Austin Hanson</name>
    </author>
    <id>http://127.0.0.1:4381/austin-hanson</id>

    <entry>
        <title>How I Learned to Give Up Programming and Accept AI</title>
        <author>
            <name>Austin Hanson</name>
        </author>
        <link href="https://austinhanson.com/how-i-learned-to-give-up-programming-and-accept-ai/"/>
        <id>https://austinhanson.com/how-i-learned-to-give-up-programming-and-accept-ai/</id>

        <updated>2026-10-15T17:06:33-05:00</updated>
            <summary type="html">
                <![CDATA[
                    <p>Thirty years of loving to program, a six-year-old at a qBasic prompt, and why I've mostly handed the keyboard to AI — not because I wanted to, but because it's no longer practical.</p>
                ]]>
            </summary>
        <content type="html">
            <![CDATA[
                
<p>I’ve thought about writing this blog for quite some time and maybe not for the reasons you might think.</p><p>You see - my first and longest passion in life has been programming. I remember, in vivid detail, my dad sitting on the carpet with 6 year old me and a big, clunky, mold-injected, dark-grey laptop. He wanted to show me qBasic - something he didn’t know himself but he had a feeling it was going to be a big deal. My dad was an electrical engineer and was versed in hardware but he could see the writing on the wall for software.</p><p>I spent hundreds of hours on that laptop. I had no idea what I was doing but I knew my dad did “stuff like this” (he didn’t) and I knew I wanted to do the things he did. I asked him tons of questions and he pointed me to the very good and rich help documentation that came with that version of qBasic. I can’t claim to have made anything amazing those first few years - but I learned a lot and I knew that was what I wanted to spend my life doing. I don’t know how or why but I just knew.</p><p>I got into C and C++ years later so I could work on MUDs. If you’re not familiar, they’re text based games generally played through a telnet client. I spent a larger part of my youth scouring around textual worlds and I wanted to be able to forge new worlds, spells, and skills as the immortals did. I remember getting CircleMUD to compile for the very first time Christmas morning. That moment eclipsed the entire Christmas.</p><p>Fast forward to a few years ago when ChatGPT was finally starting to be useful. This was post “copilot” auto-complete but pre-vibe coding as we know it. The writing was, once again, on the wall. I was working on some decentralized clustering stuff - sending custom UDP packets around to save on latency and copilot was just shoveling really good code around. This wasn’t stuff that models would have been trained on because it was completely new protocols for nodes to discover one another. I sat stunned thinking - wow - this is…crazy.</p><p>Now fast forward to about a year ago. I was working on building a web based MUD (can get away from your past) and was bouncing between Grok for writing out massive amounts of code and VS Code. I built something playable with tons of features in just a few days. I was still hand managing the code because of course I should be doing that. I had, in fact, written a few things that allowed me to work with agents from the CLI (pre-stage harnesses) but it felt wrong to just…use that for writing code. I needed to see it, read it, make sure it wasn’t garbage code.</p><p>Then a few months later I vibe coded around 40 personal projects for home automation. Straight up vibes, no VS Code, never looking at the code, never reading it, just knowing what I prompted and that the stuff was working as expected. I remember telling my wife “this is crazy, I’m just building all these things I’ve wanted to build for years and…we just get them.” And I remember telling her “my career is done.”</p><p>My wife has no problem telling me when I’m wrong and she did then. She said “Austin, you’re still doing the same things - you’re just faster. Can AI just make these things?”. I thought about it “Well, not really, I mean…I still have to explain what I want and get it to actually work. It’ll do silly, impractical things so I have to steer it the right way…” And I started feeling a little better about AI.</p><p>Not better about programming though. That which I had spent over 30 years learning, practicing, loving. No - that is largely behind me now. Not because I want it to be but because it’s no longer practical. I could sit down and hand write some Java or C#. I could spend a few days working on a project I’ve been meaning to get to. Or I could have it done this afternoon. Maybe when I retire and am looking at ways to keep the mind busy…I’ll dust off VS Code tickle the keys. But…my wife and kids take priority over my time right now.</p><p>Fast forward more months, in the tech world about three decades, and I’m confident in the tidal shifts of software development and the continued necessity of the developer. AI is a wonderful auto-complete but you have to give it the context to get what you want. That’s not just describing the problem, that’s making sure it’s solving the problem in a good way, and that it’s actually solving the problem rather than hallucinating.</p><p>These are non-trivial tasks which rely on understanding computer science fundamentals, system design and distributed systems. Further - avoiding hallucinations and validating the work is non-trivial.</p><p>Sure - you can do this all by hand. You can look at the code, review it, validate the results manually. But this is the old way - and it’s much, much slower.</p><p>Even before AI - I was a firm believer in tests. Tests gave a developer confidence that their code did what it needed to and that changes couldn’t break that. After AI - I’m a firm believer that tests are the linchpin in a system built on non-determinism and unknowns.</p><p>Ok - but how do I know my tests actually test real things? This is part of the non-trivial work we as “post-programming developers” or maybe “agent wranglers” have to do. Human-in-the-loop verification of tests, the product, and getting agents to manually verify behaviors enough that the tests and product must be good.</p><p>It’s not perfect and it’s not what my original passion is. But it’s the world now and it means we can build things in days that would have taken months. We can build systems in weeks that would have taken years. We have the powers of creation at our fingertips and need only to think to create whole new worlds.</p>
            ]]>
        </content>
    </entry>
    <entry>
        <title>AI Isn&#x27;t the Dark or Light Side</title>
        <author>
            <name>Austin Hanson</name>
        </author>
        <link href="https://austinhanson.com/ai-isnt-the-dark-or-light-side/"/>
        <id>https://austinhanson.com/ai-isnt-the-dark-or-light-side/</id>

        <updated>2026-08-08T17:07:00-05:00</updated>
            <summary type="html">
                <![CDATA[
                    <p>AI is not inherently good or bad. But after a year of building with it, it sure feels like the Force.</p>
                ]]>
            </summary>
        <content type="html">
            <![CDATA[
                
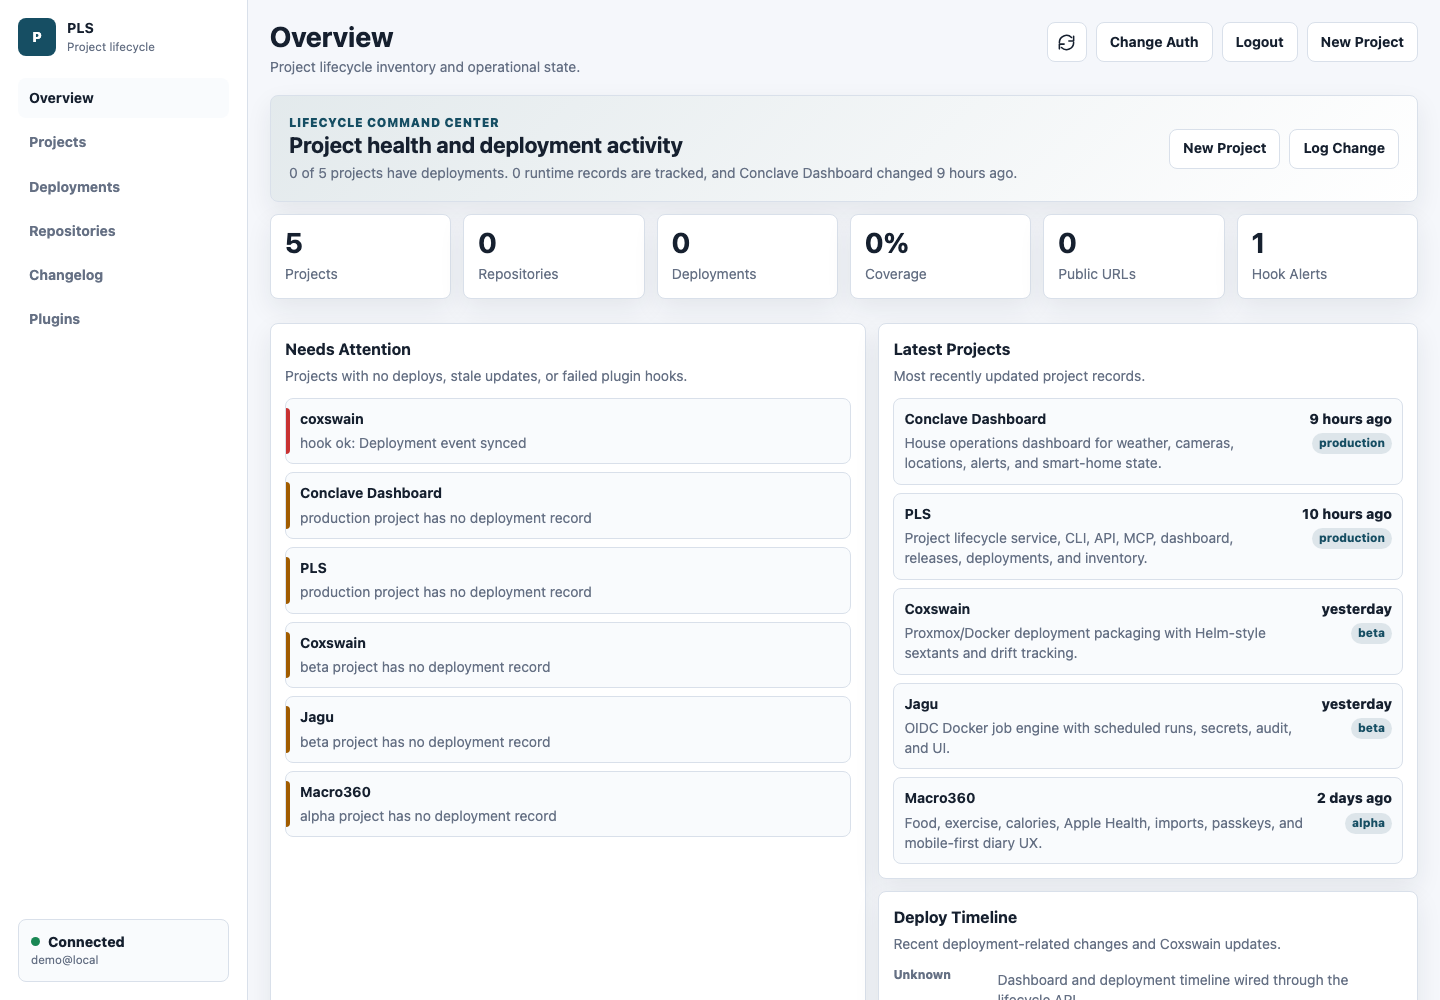
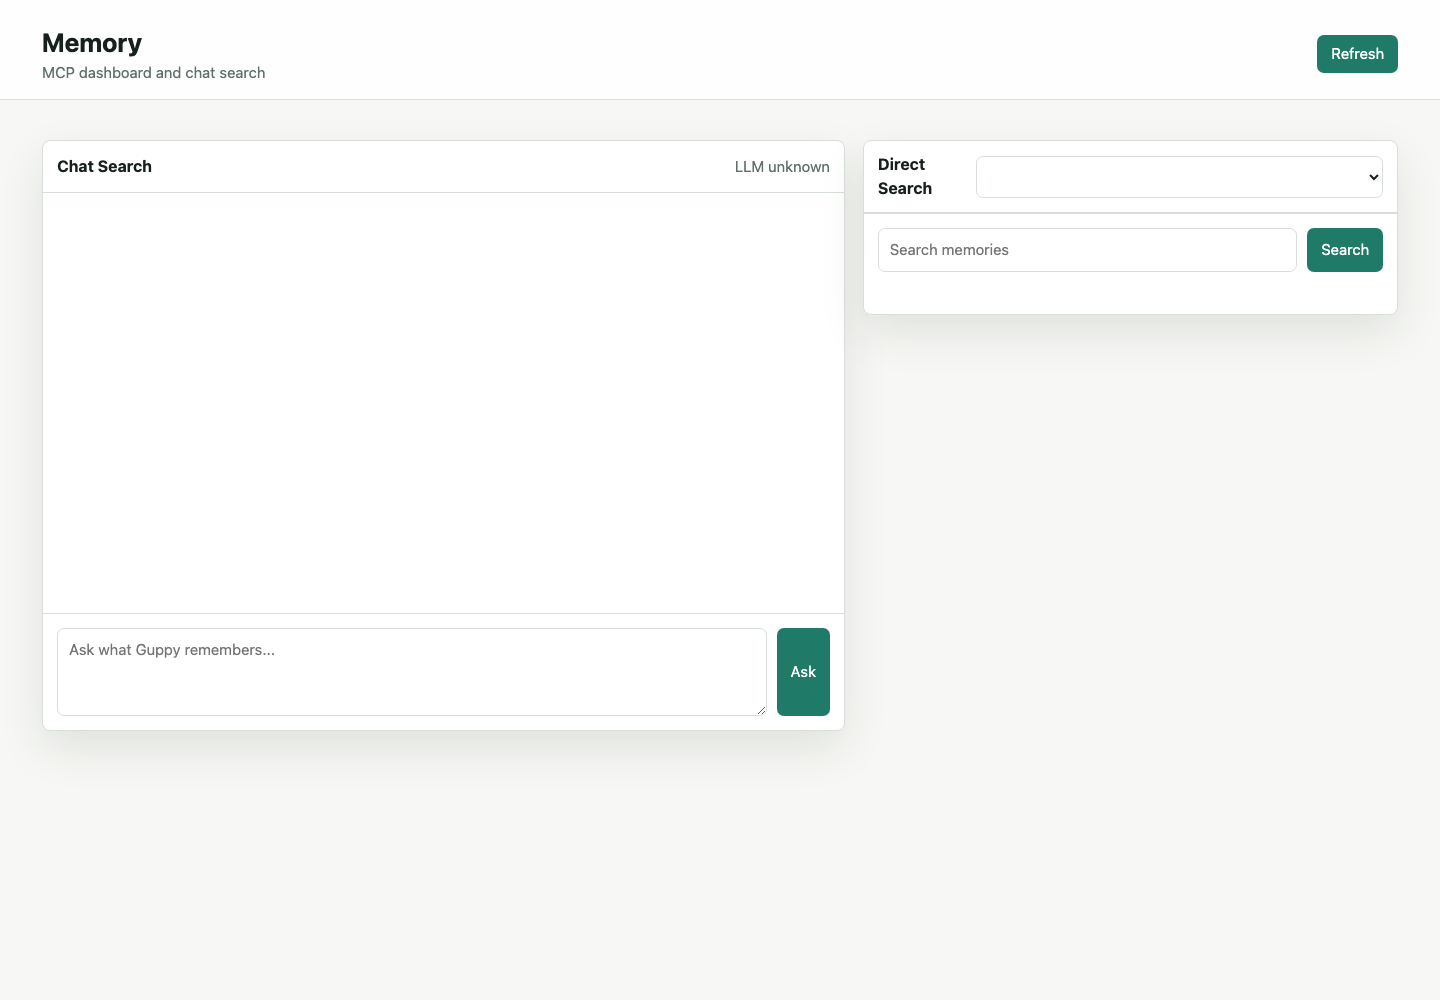
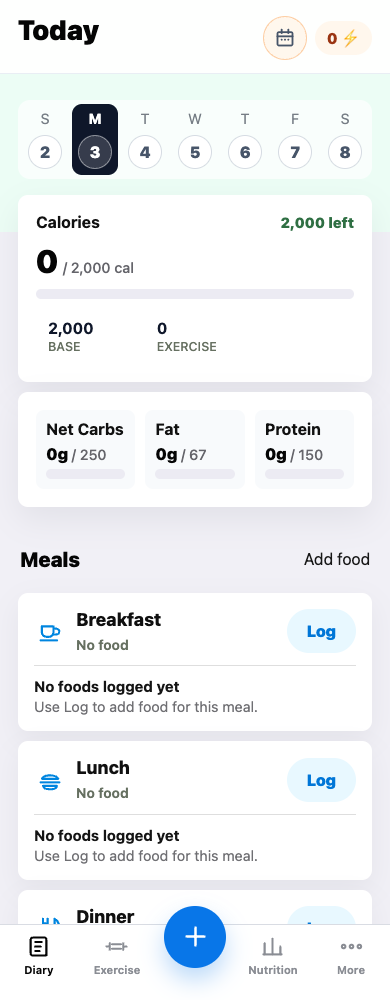
<p>tl;dr - AI is not the dark side or the light side. But, after the last year, it sure feels like the Force.</p><p>That is a goofy sentence and I know it. But it is also the closest metaphor I have for what this has felt like.</p><p>Sometime around August or September of last year I remember pushing back on my skip-level manager about AI. Not in a "this is all nonsense" kind of way. More in the way engineers tend to push back when the demo looks great but the last mile still looks like it has teeth.</p><p>The models were impressive. They could explain things, generate code, summarize documents, and generally do a convincing impression of something useful. But that was also sort of the problem. A convincing impression of useful is not the same thing as useful. It felt like the industry was asking us to trust a very enthusiastic junior developer who could type at impossible speed and occasionally forget what repository it was in.</p><p>So my position was pretty simple: AI was interesting, but it wasn't ready. Not evil. Not salvation. Just not ready.</p><p>I don't think that was a bad position at the time. Honestly, I still think skepticism was the right posture. There are few things more expensive than pretending a tool is production-ready because everyone around you is tired of nuance.</p><p>Then December happened.</p><p>We got direction to go all in on AI. This is the kind of sentence that can either be exciting or deeply concerning depending on how many production systems you've been paged for in your life. I expected to be frustrated. I expected to spend a lot of time proving that the edges were still too sharp. Instead, after spending real time with the newer models, I had the slightly uncomfortable realization that the ground had moved.</p><p>Not a little bit either.</p><p>It wasn't that AI suddenly became magic. It still made mistakes. It still needed review. It still needed someone with taste, context, and a willingness to say "no, that's not what I meant." But it had crossed some threshold where the failure mode changed. The old failure mode was "this cannot really help me build the thing." The new failure mode was "this can help me build the thing, but I need to steer it like I mean it."</p><p>That is a very different world.</p><h2 id="the-window-on-the-wall-pre-ai">The window on the wall (pre-AI)</h2><p>Our house doesn't <em>really</em> have a window to the front yard. There is a long, vertical window near our front door but it's not very useful to look through. After some convincing and pleading, my wife let me replace some artwork with a TV to act like a "window" outside. We have a number of Wyze (or did) cameras around the outside of the house so I just assumed it would be easy to show the feed.</p><p>Wyze <em>used</em> to be a very friendly, open platform but over the past 5-10 years that's really changed. They removed their RTSP firmware that let you do something like this along the way and have really built up their walled garden.</p><p>I used Grok to find alternatives and found Tapo cameras offered a very open and local friendly camera - so I replaced some of the cameras with those and got the TV showing the feed.</p><p>The problem is - it wasn't great. At that time I hadn't really dug into video (<em>yet</em>) and spent a long time trying to improve the quality and latency of the video. Really to not much avail. So I called it "good enough" but I was disappointed and my wife was a bit perturbed having not really gotten the "window" I was talking about.</p><h2 id="the-window-on-the-wall-post-ai">The window on the wall (post-AI)</h2><p>After December, I came back to the window with the full power of the dark side... erm... Force.</p><p>The first version technically worked, if you were willing to be extremely generous with the word "worked." It was a sad, overly slow and jittery video feed pretending to be a window. The TV was on the wall. The camera was outside. Photons were making some kind of journey between them. And yet the whole thing felt less like a window and more like watching the front yard through a gas station security monitor from 2008.</p><p>So I went back to it, but the question had changed. It was no longer, "Can I get a camera feed onto an Android TV?" It was, "Can I make this feel like an actual window on the wall, with a dashboard and a live-streaming, high quality, 4K view outside?"</p><p>That meant learning video in anger. I went deep on go2rtc, WebRTC, RTSP, codec profiles, hardware acceleration, keyframes, packet loss, and all the little ways a video pipeline can technically be alive while spiritually being dead. I tried direct streams. I tried transcoded streams. I tried TCP paths that looked reasonable until a tiny stall turned the whole thing into a slideshow. I added UDP ingest aliases because RTSP-over-TCP head-of-line blocking is apparently something you should care about.</p><p>But. I didn't <em>really</em> do any of that. An agent did it in roughly a total combined iteration time of 1-2 hours.</p><p>Then the single-window version became an all-camera version. I stitched the cameras into one go2rtc stream: <code>front_window_camera_grid</code>. A native 4K 2x2 canvas, four 1920x1080 tiles, all in one easily consumed format.</p><p>And then, because the window was never really just about cameras, the house state went on top of it. Weather data from...somewhere with watches and warning alerts. The current outside conditions. Family member locations...yes like Harry Potter. Automated day and night camera switching for better video quality. A front-window status endpoint that could compose all of this into one watchable page. The TV stopped being a screen showing a camera and started becoming what I had wanted in the first place: a house operations dashboard that happened to have a live view of the world outside.</p><p>The funniest part is that this eventually pulled Wyze back into the story. I had moved toward Tapo because Wyze had spent years making this harder, but apparently spite is a renewable energy source. I ended up digging into Wyze streams across generations: the older TUTK/Hualai cameras, the newer GWell/MARS/IoTVideo world, doorbells, camera models that needed different adapters, relay processes, raw H.264 frames, cloud metadata, and enough translation machinery to make them visible to go2rtc. The walled garden still had walls, but now I had a ladder, a map, and a lot of very determined code.</p><p>This is the part of the AI story that still feels wild to me. I did not become a video engineer first and then build the system. I built the system while becoming just enough of a video engineer to keep going. Every time I hit the next weird failure mode, I had a collaborator that could help me reason through it, generate another probe, explain another protocol edge, or turn a half-formed theory into an experiment.</p><p>That is how my little "window" went from a wall-window dashboard into the place where more and more of my things operated - called Conclave. Weather, cameras, locations, smart-home state, status pages, monitors, voice, notifications, the whole increasingly unreasonable pile. And everything exploded into too many parts to keep in my head, which is how I ended up needing PLS.</p><p>Nothing can stop the power of the Force. Nothing.</p><h2 id="the-shipyard">The shipyard</h2><p>So I built PLS.</p><figure class="kg-card kg-image-card kg-card-hascaption"><figure class="post__image kg-image"><img src="https://austinhanson.com/media/posts/22/pls-dashboard-loaded.png"  alt="PLS dashboard showing a project lifecycle overview with Conclave Dashboard, PLS, Coxswain, Jagu, and Macro360" loading="lazy" width="1440" height="1000" sizes="(max-width: 1200px) 100vw, 1200px" srcset="https://austinhanson.com/media/posts/22/responsive/pls-dashboard-loaded-xs.png 300w ,https://austinhanson.com/media/posts/22/responsive/pls-dashboard-loaded-sm.png 480w ,https://austinhanson.com/media/posts/22/responsive/pls-dashboard-loaded-md.png 749w ,https://austinhanson.com/media/posts/22/responsive/pls-dashboard-loaded-xl.png 1200w"></figure><figcaption><span style="white-space: pre-wrap;">PLS: the project lifecycle dashboard that became necessary once Conclave turned into a fleet.</span></figcaption></figure><p>PLS started as the answer to a very practical problem: Conclave and my agent had exploded into too many projects, services, repos, and deployments for me to keep in my head. It turned into a Rust project lifecycle service with a server, CLI, client library, REST API, MCP surface, Keycloak/OIDC auth, SQLite/Postgres persistence, an operations dashboard, deployment records, release packaging, installers, and enough tests that it feels like a real thing instead of a weekend notebook that learned HTTP.</p><p>Of course, a project lifecycle service needs deployments to track. So Coxswain grew up alongside it. Coxswain is the Proxmox/Docker deployment packaging tool (with full Helm CLI parity) that lets me package services into sextants (aka charts), deploy them into LXCs, manage runtime values, stamp versions, check drift, and sync deployment events back into PLS.</p><p>I built the window, then the place where the house operated, then enough services around that place that I needed a registry for the fleet, and then a deployer that could tell the registry what happened to the fleet.</p><p>That would have been a reasonable place to stop. Naturally, it was not where I stopped.</p><h2 id="the-assistant-substrate">The assistant substrate</h2><p>The next layer was the stuff that makes an assistant useful over time.</p><p>Memory MCP became the place for durable memory: not just "remember this sentence", but embeddings, background indexing, separate deployments, and enough structure that future work can find the shape of old work. Secrets MCP became the sane place to put credentials so agents do not spray API keys into logs, docs, shell scripts, or whatever other cursed place a token might end up if left unsupervised.</p><figure class="kg-card kg-image-card kg-card-hascaption"><figure class="post__image kg-image"><img src="https://austinhanson.com/media/posts/22/memory-dashboard.png"  alt="Memory dashboard with chat search and direct memory search panels" loading="lazy" width="1440" height="1000" sizes="(max-width: 1200px) 100vw, 1200px" srcset="https://austinhanson.com/media/posts/22/responsive/memory-dashboard-xs.png 300w ,https://austinhanson.com/media/posts/22/responsive/memory-dashboard-sm.png 480w ,https://austinhanson.com/media/posts/22/responsive/memory-dashboard-md.png 749w ,https://austinhanson.com/media/posts/22/responsive/memory-dashboard-xl.png 1200w"></figure><figcaption><span style="white-space: pre-wrap;">Memory dashboard: one of the less glamorous pieces that makes the whole assistant substrate compound.</span></figcaption></figure><p>Todo became more than a CLI. It grew tags, an MCP service, true-user auth, a REST API, a simple web frontend, API keys, OAuth login, a Tauri tray app, a SwiftBar plugin, and Logseq sync work. Fastmail MCP turned email and calendar access into something Guppy could reason about and act on without me living in an inbox.</p><p>At some point this stopped feeling like "AI helped me write some code" and started feeling like building a nervous system.</p><p>The pieces were not glamorous by themselves. Auth migrations are not glamorous. Secret catalogs are not glamorous. Deployment metadata is not glamorous unless you've been burned enough times to develop strong feelings about knowing what version is running where.</p><p>But those pieces changed everything. Once they existed, the next project started with memory, secrets, todos, docs, deployment, and observability already in the room.</p><h2 id="the-product-layer">The product layer</h2><p>Macro360 is probably the cleanest example of the shift.</p><p>It started as a food, exercise, and calorie tracking app because I wanted something to replace MyFitnessPal. It grew into auth, diary screens, food and exercise catalogs, MyFitnessPal import paths, Apple Health sync, passkeys, mobile UX passes, observability, deployment work, and a pile of small fixes that are the difference between "technically works" and "I might actually use this."</p><figure class="kg-card kg-image-card kg-card-hascaption"><figure class="post__image kg-image"><img src="https://austinhanson.com/media/posts/22/macro360-diary-current.png"  alt="Macro360 mobile diary showing calories, macros, meals, and bottom navigation" loading="lazy" width="390" height="1000" sizes="(max-width: 1200px) 100vw, 1200px" srcset="https://austinhanson.com/media/posts/22/responsive/macro360-diary-current-xs.png 300w ,https://austinhanson.com/media/posts/22/responsive/macro360-diary-current-sm.png 480w ,https://austinhanson.com/media/posts/22/responsive/macro360-diary-current-md.png 749w ,https://austinhanson.com/media/posts/22/responsive/macro360-diary-current-xl.png 1200w"></figure><figcaption><span style="white-space: pre-wrap;">Macro360: the kind of product-shaped thing that now starts as an idea and very quickly becomes a real app.</span></figcaption></figure><p>That last part is important. AI did not make the need for product taste go away. If anything, it made taste more important. When the cost of generating code drops, the value of knowing what should exist goes up.</p><p>Then there is Jagu.</p><p>Jagu started from a pretty mundane desire: I wanted a better way to run scheduled jobs for my agents and Conclave. Cron works, in the same way a folding chair works. Perfectly fine until you start asking it to be furniture.</p><p>Jagu became an OIDC-authenticated Docker job engine with an API, UI, scheduled runs, encrypted task secrets, Docker env-var injection, SQLite or bring-your-own persistence, Keycloak integration, frontend screens for tasks/runs/secrets/API keys/users/audit/system health, and deployment shape through Coxswain. It has tests for auth boundaries and real browser coverage because, again, the point was not to make a demo. The point was to make something I could trust enough to give it chores.</p><p>That is the thing I keep coming back to. The useful output of this AI wave has not been a pile of snippets. It has been chores getting promoted into systems.</p><h2 id="the-house-started-participating">The house started participating</h2><p>The funniest proof that this was different is that the window kept asking for more of the real world.</p><p>Conclave and my agents started reaching into the physical world. Ambient Weather ingestion came online. Rain Bird irrigation got an integration. MQTT got cleaned up with a broker, tests, and rebroadcasting. Smart-home work grew a local/offline-first provider layer, an agent, Alexa MCP, a private Alexa skill, voice-control services, and an M5Stack Atom Echo bridge to replace Alexa/Amazon voice integration (Alex+ just kept changing how I needed to phrase things to still do what I wanted. Plus the "ads" are extremely annoying).</p><p>That is a lot of words to say: I can talk to my house, my house can publish events, and there are now enough small services involved that a normal person would probably back away slowly.</p><p>But it works. Or, more accurately, it works, breaks in interesting ways, gets monitored, gets fixed, and works better the next time. Which is what most real systems do.</p><p>The camera work is the best example of the "breaks in interesting ways" part.</p><p>There is a Generic Camera MCP, a Tapo Camera MCP, Wyze probing, go2rtc work, and the wall-window Android TV display. It can show weather, location state, and camera feeds on the TV. There are stitched camera grids. There are RTSP streams, WebRTC paths, TCP aliases, UDP ingest experiments, and periodic monitor jobs that check whether the whole thing has quietly turned into a blank mosaic.</p><p>That sounds ridiculous because it is ridiculous. But it is also exactly the kind of thing that used to die at the "I should really do that someday" stage. With AI in the loop, "someday" started becoming Tuesday night.</p><h2 id="the-recursive-part">The recursive part</h2><p>Eventually I started using AI to build the local AI stack that I use to build the things.</p><p>There is a local LLM host on the Mac Studio running Ollama, LiteLLM, a turbo model server, local embeddings, and routing for services that need model access. Open WebUI moved to Proxmox while the heavy GPU-backed pieces stayed on the Mac Studio where they belong. There is deployment work around that too, because apparently I am no longer allowed to just run a thing and remember where it lives.</p><p>Then came the performance rabbit hole.</p><p>I spent time on MLX and TurboQuant benchmarks, prompt-cache behavior, KV cache tradeoffs, MTP scheduling, and whether there were real source-level wins hiding below the obvious configuration knobs. Some attempts helped. Some were flat. Some were rejected after measurement. This is, in other words, still engineering.</p><p>That is probably the healthiest way to think about all of this. AI did not remove the part where evidence matters. It made it possible to run more experiments, keep better notes, and move through more of the search space before running out of evening.</p><p>There were also weirder explorations: Agents and Angels, the desktop/RPG UI, Entity Overlay, audio capture, voice cloning workbenches, and Riprok. Some of these are products. Some are research. Some are me following an idea just far enough to find out whether it has legs.</p><p>I have always liked that part of programming. The difference now is that the distance between curiosity and artifact is much shorter.</p><h2 id="the-lows-are-still-lows">The lows are still lows</h2><p>None of this means AI makes software easy.</p><p>It makes some parts faster. It makes some parts much faster. It also makes it very easy to create more surface area than you can responsibly operate if you are not careful.</p><p>Auth is still auth. Secrets still need discipline. CI still fails. DNS still finds ways to be DNS. Cameras still wedge. Linux hosts still need updates. Ghost still needs security patches. Firewalls still need to be more restrictive than "sure, why not." A model can help you diagnose all of those things, but it does not make them stop existing.</p><p>The human role changes, but it does not disappear. I spend less time staring at a blank file and more time deciding what should be true. I spend less time remembering the exact syntax for everything and more time judging whether the generated plan is sane. I spend less time typing boilerplate and more time saying "no, that abstraction is not buying us anything."</p><p>Which, if I'm being honest, is a pretty good trade.</p><h2 id="so-what-is-ai">So what is AI?</h2><p>In August or September of 2025, I do not think I was wrong to be skeptical. The demos were ahead of the reliability. The hype was ahead of the habits. The industry was doing that thing where everyone says "transformational" enough times that the word starts to lose structural integrity.</p><p>But I also do not think AI is usefully described as good or bad on its own. It is not the light side. It is not the dark side. It is leverage. It amplifies intent, judgment, impatience, taste, sloppiness, discipline, curiosity, and all the other extremely human ingredients that get poured into it.</p><p>But by December, or at least by the time I seriously started building with the newer models, something had changed.</p><p>Not because the models were perfect. They were not. They are not. But they had become useful enough that the limiting factor moved. The limiting factor was no longer "can AI help with this?" It was "can I describe the system clearly enough, review it carefully enough, and keep the operational discipline around it strong enough that the output compounds instead of collapsing?"</p><p>That is a much more interesting problem.</p><p>Today PLS says there are dozens of projects in the fleet. Some are tools. Some are services. Some are apps. Some are half-research, half-confession. There are deployments, dashboards, MCP servers, voice bridges, weather ingesters, camera monitors, job schedulers, local LLM routes, and enough documentation that future me has at least a fighting chance of understanding what present me was thinking.</p><p>That's the part that feels amazing.</p><p>AI is scary, frustrating, amazing, and...it really does feel like the Force.</p>
            ]]>
        </content>
    </entry>
    <entry>
        <title>Turning Two Years of TikTok Bookmarks Into a Reading List</title>
        <author>
            <name>Austin Hanson</name>
        </author>
        <link href="https://austinhanson.com/turning-two-years-of-tiktok-bookmarks-into-a-reading-list/"/>
        <id>https://austinhanson.com/turning-two-years-of-tiktok-bookmarks-into-a-reading-list/</id>

        <updated>2026-08-03T19:51:54-05:00</updated>
            <summary type="html">
                <![CDATA[
                    <p>I turned roughly two years of saved TikTok book recommendations into a real reading list with OCR, STT, and a bunch of small agent passes.</p>
                ]]>
            </summary>
        <content type="html">
            <![CDATA[
                
<h1>Turning Two Years of TikTok Bookmarks Into a Reading List</h1>
<p>tl;dr - I had a TikTok collection full of book recommendations, collected over roughly two years, and no sane way to read it. So I pointed agents at the mess, made them OCR the videos and image slides, and ended up with 3,217 book mentions across 412 TikToks.</p>
<p>This started in the deeply respectable way most personal data projects start: I had been tapping the little bookmark button on TikTok for years and pretending that counted as organization.</p>
<p>To be fair, it sort of did. I had a collection for books. When BookTok threw some new grimdark fantasy list, sci-fi ranking, or suspiciously enthusiastic recommendation for Red Rising at me, I saved it. The problem is that TikTok book recommendations are not really data. They are videos, captions, subtitles, image carousels, cover shots, creator patter, stitched audio, and sometimes a single blurry slide with twelve titles on it.</p>
<p>So after a couple of years of this, I had something that looked like a reading list but behaved more like a junk drawer.</p>
<p>I wanted a boring table:</p>
<ul><li>TikTok URL</li><li>books recommended in it</li><li>evidence for each recommendation</li><li>total count by book</li></ul>
<p>Simple enough, except the books were not in one place. Some were in the description. Some were in the auto-generated subtitles. Some were in the video itself. A lot were in TikTok&#x27;s photo-mode slides, which still have URLs that look like <code>/video/{id}</code> because why make this easy?</p>
<p>Anyway, I had agents now. This seemed like exactly the sort of fiddly task they should be good at.</p>
<h2>Getting The Pile</h2>
<p>The first step was getting the collection out of TikTok. I used the logged-in web API call behind the collection page and paged through it until I had the whole thing locally.</p>
<p>That gave me 412 TikToks.</p>
<p>At this point I had metadata: IDs, URLs, authors, descriptions, subtitle links where TikTok exposed them, and for photo-mode posts the <code>imagePost.images</code> array. That last bit ended up mattering a lot.</p>
<p>I did the obvious first pass:</p>
<ul><li>parse descriptions for explicit &quot;Books mentioned&quot; lists</li><li>fetch subtitle files where available</li><li>pull structured metadata out of the API response</li><li>aggregate title counts conservatively</li></ul>
<p>That got a decent chunk of the way there, but not nearly all the way. BookTok is not a well-formed CSV file, despite my personal wishes.</p>
<h2>The First Wrong Pass</h2>
<p>The next assumption was that the leftovers were video-only.</p>
<p>So I downloaded the remaining TikToks with <code>yt-dlp</code>, sampled every fifth frame with <code>ffmpeg</code>, OCR&#x27;d those frames locally with Apple&#x27;s Vision framework, pulled audio to WAV, and ran local Whisper STT on it. Then I batched the OCR/STT text to subagents and had them extract book titles instead of trying to hand-roll a parser for &quot;bookish human speaking over screenshots.&quot;</p>
<p>This was useful, but it also produced a weird result. A bunch of the &quot;videos&quot; had no video stream. They had an audio track and a cover image. The OCR looked like:</p>
<blockquote><p>TOP 10 SCIENCE FICTION NOVELS OF THE 2000S</p></blockquote>
<p>Which is not, strictly speaking, the list.</p>
<p>This is where Austin from twenty minutes later was smarter than Austin from twenty minutes earlier: those were not normal videos. They were TikTok photo-mode posts. TikTok shows them at <code>/video/...</code>, but the API has an <code>imagePost</code> object with every slide in the carousel.</p>
<p>Back to the scraper.</p>
<h2>OCR, But Actually The Slides This Time</h2>
<p>The corrected pass used <code>imagePost.images</code> directly. For each unresolved TikTok, I downloaded every slide image and OCR&#x27;d each slide independently. This was the missing step.</p>
<p>The final unresolved batch was:</p>
<ul><li>74 photo-mode slide decks</li><li>683 individual slide images</li><li>136,788 characters of fresh OCR</li><li>0 download/OCR errors</li></ul>
<p>Those slide decks added 609 more recommendation mentions by themselves.</p>
<p>The extraction workflow was pretty simple:</p>
<ol><li>Save the raw API pages locally.</li><li>Fetch descriptions, subtitles, and image slides.</li><li>Run local OCR and STT.</li><li>Split the resulting text into small batches.</li><li>Send each batch to a subagent with a strict JSON schema.</li><li>Merge the results into one TikTok-to-recommendations map.</li><li>Rebuild aggregate counts from that map.</li></ol>
<p>The subagent part is worth calling out. I did not want to pretend that &quot;OCR text from a TikTok slide&quot; is easy to parse with regex. Sometimes the title is next to the author. Sometimes the author is half missing. Sometimes the slide has blurbs, rankings, UI text, and a book cover all smashed together. The useful unit of work was not &quot;extract all capitalized words.&quot; It was &quot;look at this messy evidence and decide which titles are clearly recommendations.&quot;</p>
<p>That is a good agent task. Bounded, checkable, annoying, and mostly judgment rather than architecture.</p>
<h2>The Result</h2>
<p>After the corrected slide pass, the catalog covered all 412 TikToks.</p>
<p>The final numbers:</p>
<ul><li>412 TikToks cataloged</li><li>3,217 TikTok-level recommendation mentions</li><li>1,634 unique normalized recommendations</li><li>683 image slides OCR&#x27;d in the final correction pass</li><li>0 items left in the review queue</li></ul>
<p>The top recommendations were not shocking, but they were satisfying:</p>
<table><thead><tr><th>Rank</th><th>Book / Series</th><th>Count</th></tr></thead><tbody><tr><td>1</td><td>Red Rising</td><td>52</td></tr><tr><td>2</td><td>Dungeon Crawler Carl</td><td>31</td></tr><tr><td>3</td><td>Dune</td><td>25</td></tr><tr><td>4</td><td>Project Hail Mary</td><td>25</td></tr><tr><td>5</td><td>The Sword of Kaigen</td><td>25</td></tr><tr><td>6</td><td>Sun Eater</td><td>23</td></tr><tr><td>7</td><td>The Poppy War</td><td>22</td></tr><tr><td>8</td><td>The First Law</td><td>21</td></tr><tr><td>9</td><td>The Fifth Season</td><td>20</td></tr><tr><td>10</td><td>Piranesi</td><td>19</td></tr><tr><td>11</td><td>Mistborn</td><td>19</td></tr><tr><td>12</td><td>A Song of Ice and Fire</td><td>18</td></tr><tr><td>13</td><td>Blood Over Bright Haven</td><td>17</td></tr><tr><td>14</td><td>The Wheel of Time</td><td>16</td></tr><tr><td>15</td><td>Assassin&#x27;s Apprentice</td><td>16</td></tr><tr><td>16</td><td>Children of Time</td><td>16</td></tr></tbody></table>
<p>Red Rising being number one by a mile is maybe the least surprising thing that has ever happened on BookTok. I am not complaining. It just feels like the algorithm has a quota.</p>
<h2>The Weirdly Useful Part</h2>
<p>The useful part of this was not that I got a list of books. Though, yes, I did get a list of books, and my TBR is now less a list and more a zoning problem.</p>
<p>The useful part was that this was a genuinely personal dataset that I could not reasonably process by hand. It was too big to casually inspect, too messy for a simple script, and too small/weird to justify building some polished product around it.</p>
<p>That is where agents fit nicely.</p>
<p>Not in a &quot;replace all software&quot; way. More in a &quot;take this pile of semi-structured personal exhaust and turn it into something I can actually use&quot; way.</p>
<p>The workflow was not magic. It still needed me to notice when the first pass was wrong. It still needed local OCR. It still needed API spelunking. It still needed schema checks, merge scripts, and a final sanity pass. But the agents made the middle part tractable: hundreds of small judgment calls over messy captions, slides, subtitles, and OCR fragments.</p>
<p>That feels like the shape of a lot of useful agent work right now. Not a shiny demo. Not a chatbot pretending to be a database. Just a patient little assembly line for all the annoying glue work between &quot;I have this somewhere&quot; and &quot;I can use this now.&quot;</p>
<p>At the end of the day, I still have too many books to read.</p>
<p>But now at least I know which ones TikTok has been yelling at me about for two years.</p>
            ]]>
        </content>
    </entry>
    <entry>
        <title>The Many Iterations of my Smart Home</title>
        <author>
            <name>Austin Hanson</name>
        </author>
        <link href="https://austinhanson.com/the-many-iterations-of-my-smart-home/"/>
        <id>https://austinhanson.com/the-many-iterations-of-my-smart-home/</id>

        <updated>2025-08-01T07:51:30-05:00</updated>
            <summary type="html">
                <![CDATA[
                    tl;dr - OpenHab v3, SLZB-06, Proxmox, Dell PowerEdge R730xd Server, various zigbee devices. I've managed some semblance of a smart home for the past 7 years. This began as most things like these do - a toe in the water, then a foot, and then suddenly you've fallen in and&hellip;
                ]]>
            </summary>
        <content type="html">
            <![CDATA[
                <p>tl;dr - OpenHab v3, SLZB-06, Proxmox, Dell PowerEdge R730xd Server, various zigbee devices.</p><p>I've managed some semblance of a smart home for the past 7 years. This began as most things like these do - a toe in the water, then a foot, and then suddenly you've fallen in and are trying to stay afloat.</p><p>The toe was smart light bulb. I got it from a random company giving them away at <a href="https://www.comic-con.org/">San Diego's Comic Con</a> (I think around 2017). It may have only been bluetooth... I don't remember. But it piqued my interest enough to say to myself "Some day, my home is going to be smart. Like that Disney movie but without the house trying to kill me."</p><p>The foot was a batch of Sengled light bulbs that connected to Alexa through a proprietary hub. We had a few Amazon devices already so it was a logical step. This was around the time FAANG were dipping their own toes in the metaphorical water so the integrations were there but not great. The Alexa app left a <em>lot</em> to be desired (note: it still does - they never really went beyond the toe) and it became quickly apparent trying to set up rules and schedules that this wasn't the smart home I envisioned. Not only that, but the hub seemed to be quite limited in range. I could reach bulbs in my house but it struggled to communicate with bulbs outside.</p><p>Fortunately for me, Sengled had done things <em>right</em>. That hub was simply a zigbee hub and the light bulbs were all run over the zigbee protocol. I found all of this out while deep diving what I needed to do to set up a "proper" smart home.</p><p>The first improper version of this proper smart home ended up using <a href="https://www.home-assistant.io/">Home Assistant</a>. This was still around the 2018 time, I'm not sure where that would fall in Home Assistant versions, but it was <em>relatively</em> easy to set up. I picked up a Raspberry Pi and a random zigbee/zwave dongle from Amazon and got cracking. A few hours later and I was able to control the light bulbs in my house. A few days later, and I can't quite remember if I had to set up a custom Alexa skill and/or an app, but I then was back at sqaure one with the Sengled bulbs - Alexa controlled. But this time with a better zigbee hub.</p><p>Some time passed, I added more bulbs [<a href="https://www.amazon.com/dp/B074K427TZ">1</a>, <a href="https://www.amazon.com/dp/B074QPM8T2">2</a>, <a href="https://www.amazon.com/dp/B09FLSNCZK">3</a>], some smart light switches [<a href="https://www.amazon.com/dp/B015YJAHY0">1</a>, <a href="https://www.amazon.com/dp/B08428P2MC">2</a>], and some scenes to better manage daily/nightly tasks. To this day, one of those scenes, still exists - "master movie scene on/off" which turns on our lamps and turns our bedroom lights off. But not all things were right in the Hanson household - many zigbee devices would occasionally just not work. The Alexa integration itself would occasionally stop working.</p><p>This takes us to version two of the smart home - where I moved from Home Assistant over to OpenHab, version 1, if I recall correctly. Perhaps a little hasty, this move was driven by a number of posts I found advocating for its better integrations and better zigbee support.</p><p>So I wiped away the Raspberry Pi SD card, burned in OpenHab's raspbian custom image, and got started starting over.</p><p>I will say, OpenHab was way less polished than Home Assistant. Years later, now on v3, I'd still say it's probably less polished out of the gate. You can make it look pretty - but its very much on you to do.</p><p>It took a little doing, mostly learning OpenHab's peculiarities in setting up devices. I used there old, yet seemingly better, UI that allowed adding devices dynamically. More on this later... A few hours later, or maybe days, and our smart home was back up and running. Alexa integration was a few days later and used <em>their</em> app so I didn't have to manage an Alexa developer account anymore.</p><p>This ran fine for probably 6 months and then, growing in frequency, Alexa would simply not be able to interact with certain devices. The fix was restarting the Raspberry Pi and everything would work. This would last for a few months until a restart was needed to "fix things" again. Then it would only last a few weeks. Then it was down to a few days. Obviously...things weren't going in the right direction. Not only that, we <em>actually used</em> a few things frequently ("Alexa, turn master movie scene on" and "Alexa, goodnight") and having it not work was really cramping our style!</p><p>So, on a cold, miserable night in Janua... I don't actually know when I did this - I started digging into the problem. It turns out, many people online were complaining about this and, seemingly, OpenHab was saying it was a zigbee issue. That tooks me down a few paths that led to "you just need to use an MQTT broker and zigbee2MQTT". As a developer...I'm not sure why the zigbee integration couldn't be "fixed" but I also wasn't jumping in to do the fixing... so I installed the MQTT broker and <a href="https://www.zigbee2mqtt.io/">zigbee2MQTT</a> on the Raspberry Pi while moving from OpenHab v1 to v2. As a sidenote for the reader, and if I remember correctly, this was yet another destructive upgrade that forced me to rebuild everything from the ground up. I also picked up a <a href="https://www.amazon.com/dp/B09KXTCMSC">new zigbee dongle</a> just in case the issue was with the old dongle.</p><p>A few hours later, or days, and things were working again. Now my memory is particularly hazy at this point (it <em>actually</em> always is) but this might have been when OpenHab ditched their old UI and forced you to hard code the zigbee devices in YAML files... Or that might just be because the MQTT broker doesn't support any kind of dynamic device adding... I'm not really sure - but suffice it to say, at some point, I was no longer able to just casually add new devices anymore and I had to manually add them in <a href="https://www.openhab.org/docs/configuration/items.html">OpenHab's YAML configurations</a>. Not a huge deal for me but no casual user would ever do this... Ok, they'd never do anything above either...</p><p>Things were one again working in the world. The annoying Raspberry Pi restarting issue that plagued us was gone and fixed and everything was great. Or so I thought.</p><p>Maybe a year after that, I think somewhere around 2022 or 2023, things would occasionally just not work. Alexa would say it couldn't reach the hub, same old, same old. <em>Seeeeeeemingly</em>, the Raspberry Pi was overheating? Or for some reason rebooting?</p><p>Now, this was also around the time I was chatting with some folks about setting up a "home lab" and/or local kubernetes clusters to run things. Rather than digging into the issue with the Raspberry Pi I figured this was an opportunity to invest in some infrastructure. I picked up a <a href="https://www.amazon.com/dp/B0B7RT33ZX">couple little micro form factor PCs</a> (Beelink something) and installed <a href="https://www.proxmox.com/en/">Proxmox</a> on it. I quickly realized this was entirely too few resources and returned the one I still could and kept the other. Around the same time I buddy gave me a few extra mff PCs he'd had that were a little punchier. I set those up as proxmox nodes and had a nice little "home lab". I then added a few VMs for OpenHab v3, MQTT, and zigbee2MQTT, figured out how to pass the zwave/zigbee USB dongle through to the VM, and we were back in business!</p><p>Fast forward a couple years and I ended up buying a <a href="https://www.amazon.com/dp/B092SNZG3V">Dell PowerEdge R730xd Server</a> to expand my my home lab. I started shuffling VMs over to it from the mff PCs but couldn't move the zigbee2MQTT VM as it had to access the USB dongle. This wasn't really a problem as the little PC was tucked away but it was an annoyance - I didn't really want the little PC anymore.</p><p>Then, at some point, the Bee-something mff PC started randomly not being able to talk to VMs on the network. Other things could talk to it, and it to some things on the network, but not everything. With only minimal digging, an <code>ifreload -a</code> would fix the problem and make things right. Occam's razor would suggest something to do with the VM shuffling, maybe a conflicting IP address, or something - but I also started seeing random warnings in the syslog for the networking stack... All I knew was, things were looking a lot like they had before - bad.</p><p>I ended up running across this <a href="https://www.amazon.com/SMLIGHT-SLZB-06-Coordinator-Universal-Zigbee2MQTT/dp/B0D4J23RJ2">SLZB-06 zigbee coordinator/hub/thing</a> a week or so ago. This essentially turns the USB dongle into a standalone device. A few hours later and the mff PC is gone, the SLZB-06 in its place, and everything is right again! ¯\_(ツ)_/¯</p>
            ]]>
        </content>
    </entry>
    <entry>
        <title>Bare Metal Zig</title>
        <author>
            <name>Austin Hanson</name>
        </author>
        <link href="https://austinhanson.com/bare-metal-ziglang/"/>
        <id>https://austinhanson.com/bare-metal-ziglang/</id>

        <updated>2023-10-06T10:44:35-05:00</updated>
            <summary type="html">
                <![CDATA[
                    <p>Lately I've had a nagging interest in working on a minimal OS again using Zig.

To do that, seemingly I need to compile a freestanding Zig binary and then extend it into a Zig kernel capable of being ran by some bootloader.</p>
                ]]>
            </summary>
        <content type="html">
            <![CDATA[
                
<p>Lately, I've had a nagging interest in working on a minimal OS <a href="https://austinhanson.com/vscode-gdb-and-debugging-an-os/">again</a>.</p><p>Philipp Oppermann's guide to <a href="https://os.phil-opp.com/">Writing an OS in Rust</a> is an absolutely fantastic place to start and I encourage anyone interesting in programming to go through it.</p><p>As indicated above, I've been hankering for something really <em>low</em> level but, truth be told, I didn't really care for Rust. I <em>understand</em> that its borrow-checker is its secret sauce and what makes it a better suited language for writing reliable programs. But I really don't like the added complexity. Consider the fact that there are an overly unhealthy number of StackOverflow questions asking how to implement linked lists and other trivial data structures in Rust. I digress, I don't want to make this a bash Rust post - this post is not that.</p><p>What I <em>do</em> want to go over is getting something in <a href="https://ziglang.org/">Zig</a> running on <a href="https://en.wikipedia.org/wiki/Bare_machine">"bare metal"</a>.</p><blockquote>In computer science, <strong>bare machine</strong> (or <strong>bare metal</strong>) refers to a <a href="https://en.wikipedia.org/wiki/Computer">computer</a> executing instructions directly on logic hardware without an intervening <a href="https://en.wikipedia.org/wiki/Operating_system">operating system</a>.</blockquote><p>There seems to be a fair amount of interest in doing this but mostly centered around writing something for the Raspberry Pi [<a href="https://github.com/markfirmware/zig-bare-metal-raspberry-pi/blob/master/build.zig">1</a>] or other micro-controllers [<a href="https://zig.news/maldus512/zig-bare-metal-programming-on-stm32f103-booting-up-5424">1</a>, <a href="https://github.com/markfirmware/zig-bare-metal-microbit">2</a>]. That might be something I look in to later but for now I'd really like to mostly follow along with Oppermann's blog guide but in Zig.</p><p>To do that, seemingly I need to compile a freestanding Zig binary and then extend it into a Zig kernel capable of being ran by some bootloader.</p><p>Unsurprisingly, I'm not the <em>first</em> person to try this [<a href="https://github.com/jzck/kernel-zig">1</a>, <a href="https://github.com/andrewrk/HellOS">2</a>, <a href="https://wiki.osdev.org/Zig_Bare_Bones">3</a>] so there was a bit of a path to follow.</p><p>First things first, let's work on compiling a free-standing Zig binary. We can actually accomplish that directly by passing some arguments to <code>zig</code>.</p><blockquote>Zig is very much a growing language right now with a fair number of breaking changes happening with every version. I'm going to be using 0.8.1 and I'm not going to tell you why - just yet anyway.</blockquote><blockquote><em>Ok, fine, it's because this is a work in progress and that's the latest version I've gotten things to work with.</em> <em>Seemingly, everything here should work up until 0.10.0 as Async functions and support for overriding the stack pointer is missing in <a href="https://ziglang.org/news/0.11.0-postponed-again/">0.11.0 and beyond until...it's readded</a>. </em>¯\_(ツ)_/¯</blockquote><pre><code class="language-bash">zig build-exe freestanding.zig -target i386-freestanding</code></pre><h3 id="a-simple-freestanding-binary">A Simple Freestanding Binary</h3><p>Let's try that with a simple Zig program.</p><p><code>freestanding.zig</code></p><pre><code class="language-zig">const std = @import("std");

pub fn main() void {
    std.debug.print("Hello, world!\n", .{});
}</code></pre><p>And it compiles but with a linker warning...</p><pre><code class="language-bash">➜  zig build-exe src/freestanding.zig -target i386-freestanding
warning(link): unexpected LLD stderr:
ld.lld: warning: cannot find entry symbol _start; not setting start address</code></pre><p>There's not a lot of documentation for the freestanding targets but we can surmise that a freestanding targeted binary requires a <code>_start</code> method rather than relying on <code>main</code>. This is <em>probably</em> because of the lack of an initial runtime (<a href="https://en.wikipedia.org/wiki/Crt0">crt0</a>). ¯\_(ツ)_/¯</p><p><code>freestanding.zig</code></p><pre><code class="language-zig">const std = @import("std");

export fn _start() void {
    @call(.{ }, main, .{});
}

pub fn main() void {
    std.debug.print("Hello, world!\n", .{});
}</code></pre><p>Which compiles with</p><pre><code class="language-bash">➜  zig build-exe src/freestanding.zig -target i386-freestanding
/usr/local/etc/zig/0.8.1/lib/std/fs/file.zig:20:15: error: container 'std.os' has no member called 'fd_t'
    handle: os.fd_t,
              ^
/usr/local/etc/zig/0.8.1/lib/std/debug.zig:67:22: note: referenced here
    const stderr = io.getStdErr().writer();
                     ^</code></pre><p>This is even less obvious but it's because we can't use the standard library with a freestanding binary!</p><p><code>freestanding.zig</code></p><pre><code class="language-zig">const std = @import("std");

export fn _start() callconv(.Naked) noreturn {
    @call(.{ }, main, .{});
}

pub fn main() void { }</code></pre><p>If you read through the Rust <a href="https://os.phil-opp.com/freestanding-rust-binary/">variant</a> then you know that we mark the <code>_start</code> method with export ensuring it uses the <a href="https://en.wikipedia.org/wiki/Calling_convention">C calling convention</a>. You're also aware that the <code>_start</code> method is called by the system and isn't expected to return anything so we loop instead and mark the method as <code>noreturn</code>. Finally, we also mark the method as having a <code>Naked</code> calling convention which "makes a function not have any function prologue or epilogue".</p><blockquote>If you didn't do the <code>export</code>, <code>noreturn</code>, and <code>callconv(.Naked)</code> stuff above compilation still succeeds. You'll get an <code>ld.lld</code> linker warning saying it couldn't find <code>_start</code> and defaults to 0x100000. Then when you eventually get a kernel image nothing happens.<br><br>Coincidentally, if you only use <code>export</code> but skip the rest, things seemingly work. But we'll blinding follow along the path laid out before use [<a href="https://os.phil-opp.com/freestanding-rust-binary/">1</a>, <a href="https://wiki.osdev.org/Zig_Bare_Bones">2</a>, <a href="https://github.com/andrewrk/HellOS/blob/master/hellos.zig">3</a>] making sure we're tidy and abiding system call etiquette.</blockquote><p>And <em>this</em> finally compiles successfully!</p><p>Ok, that wasn't so bad...but we can't run it on MacOS?</p><pre><code class="language-bash">➜  ./main
zsh: exec format error: ./main</code></pre><p>Not surprising actually, given the binary we built targeted an i386 system and is an <a href="https://en.wikipedia.org/wiki/Executable_and_Linkable_Format">ELF file</a>. ELF is a common executable file format used by a number of types of systems but, if you're running MacOS, you'd need a Mach-O formatted file.</p><p>You can experiment a little with this by specifying different targets and inspecting the type of file.</p><pre><code class="language-bash">➜  zig build-exe src/freestanding.zig -target i386-freestanding
➜  file kernel
kernel-mb1: ELF 32-bit LSB executable, Intel 80386, version 1 (SYSV), statically linked, with debug_info, not stripped
➜  zig build-exe src/freestanding.zig -target x86_64-macos
➜  file kernel
kernel: Mach-O 64-bit executable x86_64</code></pre><h3 id="a-runnable-kernel">A Runnable Kernel</h3><p>We have a freestanding, ELF-32 formatted binary but we can't do anything with it.</p><p>That's not true! We can turn it into a <a href="https://en.wikipedia.org/wiki/Kernel_(operating_system)">"kernel"</a> by making it multiboot compliant so we can run it with <a href="https://www.qemu.org/">QEMU</a> directly via <code>-kernel</code> which supports loading mutliboot1 compliant kernels.</p><blockquote>Note: QEMU's <code>-kernel</code> <a href="https://forum.osdev.org/viewtopic.php?f=1&amp;t=33412">doesn't support</a> loading multiboot2 compliant kernels.</blockquote><p><code>linker.ld</code></p><pre><code class="language-ld">ENTRY(_start)
 
SECTIONS {
    . = 1M;
 
    .text : ALIGN(4K) {
        KEEP(*(.multiboot))
        *(.text)
    }
 
    .rodata : ALIGN(4K) {
        *(.rodata)
    }
 
    .data : ALIGN(4K) {
        *(.data)
    }
}</code></pre><p>This linker script forces the first section to be the multiboot1 header followed by executable program code. Next we specify sections for read-only data and mutable data. See <a href="https://blog.thea.codes/the-most-thoroughly-commented-linker-script/">this most thoroughly commented linker script</a> for an example script with great documentation.</p><p>And we need to update <code>freestanding.zig</code> to a <a href="https://www.gnu.org/software/grub/manual/multiboot/multiboot.html">mutliboot compliant kernel</a>.</p><p><code>kernel.zig</code></p><pre><code class="language-zig">const ALIGN = 1 &lt;&lt; 0;
const MEMINFO = 1 &lt;&lt; 1;
const MB1_MAGIC: u32 = 0x1BADB002;
const FLAGS: u32 = ALIGN | MEMINFO;
 
const MultibootHeader = packed struct {
    magic: u32 = MB1_MAGIC,
    flags: u32,
    checksum: u32,
};
 
export var multiboot align(4) linksection(".multiboot") = MultibootHeader {
    .flags = FLAGS,
    .checksum = @intCast(u32, ((-(@intCast(i64, MB1_MAGIC) + @intCast(i64, FLAGS))) &amp; 0xFFFFFFFF)),
};
 
export fn _start() callconv(.Naked) noreturn {
    @call(.{ }, main, .{});
    while (true) {}
}

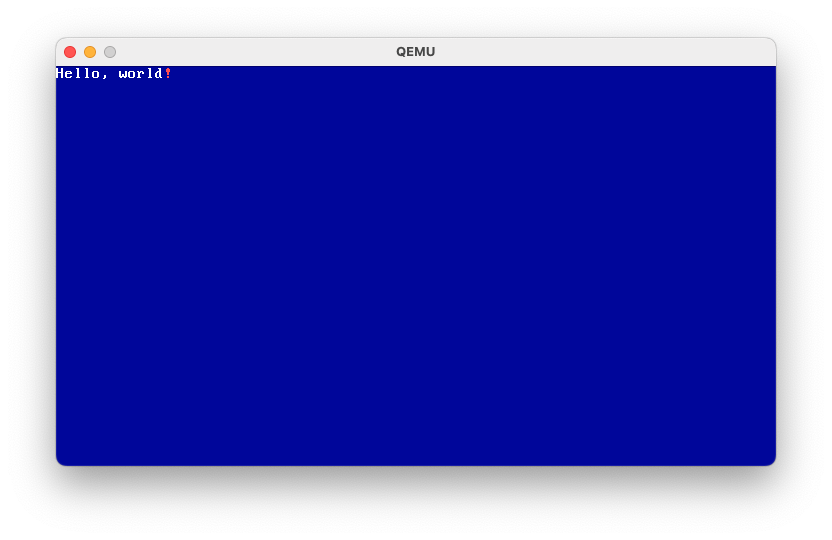
pub fn main() void { }</code></pre><p>There's a lot going on here but it's all specific to making the "kernel" (come on, it's not doing <em>anything</em>) multiboot1 compliant.</p><p>We create some constants, a <a href="https://ziglang.org/documentation/master/#packed-struct">packed struct</a> to define the layout of the data, and then an exported variable, <code>multiboot</code>, containing our actual multiboot1 data.</p><p>We annotate the exported variable with <code>align(4)</code> and <code>linksection(".multiboot")</code> which lets the linker know we want the section 4-byte aligned and associated with the <code>.multiboot</code> section in the linker script.</p><p>And that's that! We can then compile the freestanding, i386 targeted, multiboot1 compliant binary and run it with QEMU!</p><pre><code class="language-bash">➜  zig build-exe src/kernel.zig -target i386-freestanding -T src/kernel.ld
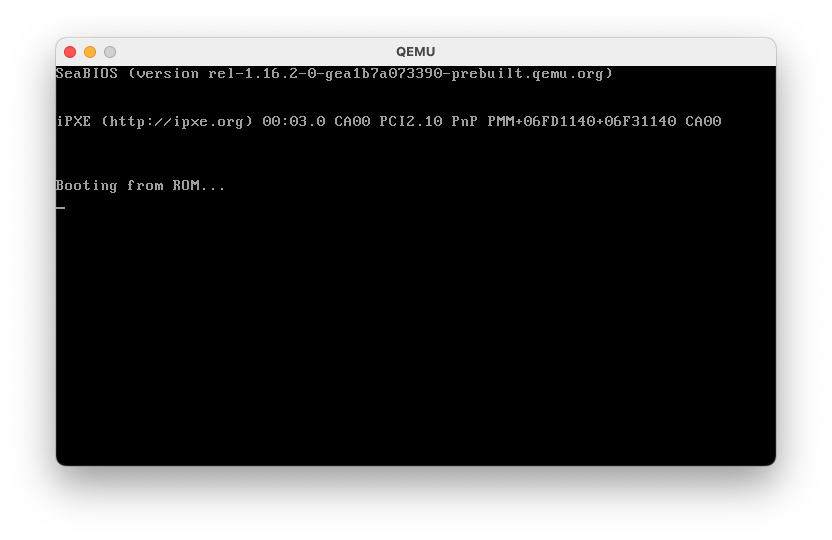
➜  qemu-system-x86_64 -kernel kernel</code></pre><figure class="kg-card kg-image-card kg-card-hascaption"><figure class="post__image kg-image"><img src="https://austinhanson.com/media/posts/19/image.png"  alt loading="lazy" width="832" height="540" sizes="(max-width: 1200px) 100vw, 1200px" srcset="https://austinhanson.com/media/posts/19/responsive/image-xs.png 300w ,https://austinhanson.com/media/posts/19/responsive/image-sm.png 480w ,https://austinhanson.com/media/posts/19/responsive/image-md.png 749w ,https://austinhanson.com/media/posts/19/responsive/image-xl.png 1200w"></figure><figcaption>Running a Zig kernel</figcaption></figure><p>Erm... Did it actually do anything? Yes! Yes it did! It didn't fail to launch! Ok... but let's make it at least print hello world like all of the other guides do.</p><h3 id="a-useful-runnable-kernel">A Useful (?), Runnable Kernel</h3><p>Making our "kernel" print to the screen is a lot harder than just using <code>std.debug.print</code> because we don't have access to the standard library. So...we'll have to roll our own. Surprisingly, it's not <em>too</em> terribly difficult because we can get direct access to the VGA text buffer [<a href="https://en.wikipedia.org/wiki/VGA_text_mode">1</a>, <a href="https://os.phil-opp.com/printing-to-screen/">2</a>].</p><p>Here's a heavily inspired (<a href="https://wiki.osdev.org/Zig_Bare_Bones#src.2Fconsole.zig">mostly copied)</a> <code>console.zig</code> which lets you change colors and print text.</p><p><code>console.zig</code></p><pre><code class="language-zig">const fmt = @import("std").fmt;
const mem = @import("std").mem;
const Writer = @import("std").io.Writer;
 
const VGA_WIDTH = 80;
const VGA_HEIGHT = 25;
const VGA_SIZE = VGA_WIDTH * VGA_HEIGHT;

/// Enumeration of VGA Text Mode supported colors.
pub const Colors = enum(u8) {
    Black = 0,
    Blue = 1,
    Green = 2,
    Cyan = 3,
    Red = 4,
    Magenta = 5,
    Brown = 6,
    LightGray = 7,
    DarkGray = 8,
    LightBlue = 9,
    LightGreen = 10,
    LightCyan = 11,
    LightRed = 12,
    LightMagenta = 13,
    LightBrown = 14,
    White = 15,
};

/// The current cursor row position.
var row: usize = 0;

/// The current cursor column position.
var column: usize = 0;

/// The current color active foreground and background colors.
var color = vgaEntryColor(Colors.LightGray, Colors.Black);

/// Direct memory access to the VGA Text buffer.
var buffer = @intToPtr([*]volatile u16, 0xB8000);

/// Create a VGA color from a foreground and background Colors enum.
fn vgaEntryColor(fg: Colors, bg: Colors) u8 {
    return @enumToInt(fg) | (@enumToInt(bg) &lt;&lt; 4);
}

/// Create a VGA character entry from a character and a color
fn vgaEntry(uc: u8, newColor: u8) u16 {
    var c: u16 = newColor;
    return uc | (c &lt;&lt; 8);
}

/// Set the active colors.
pub fn setColors(fg: Colors, bg: Colors) void {
    color = vgaEntryColor(fg, bg);
}

/// Set the active foreground color.
pub fn setForegroundColor(fg: Colors) void {
    color = (0xF0 &amp; color) | @enumToInt(fg);
}

/// Set the active background color.
pub fn setBackgroundColor(bg: Colors) void {
    color = (0x0F &amp; color) | (@enumToInt(bg) &lt;&lt; 4);
}

/// Clear the screen using the active background color as the color to be painted.
pub fn clear() void {
    mem.set(u16, buffer[0..VGA_SIZE], vgaEntry(' ', color));
}

/// Sets the current cursor location.
pub fn setLocation(x: u8, y: u8) void {
  row = x % VGA_WIDTH;
  column = y &amp; VGA_HEIGHT;
}

/// Puts a character at the specific coordinates using the specified color.
fn putCharAt(c: u8, newColor: u8, x: usize, y: usize) void {
    const index = y * VGA_WIDTH + x;
    buffer[index] = vgaEntry(c, newColor);
}

/// Prints a single character
pub fn putChar(c: u8) void {
    putCharAt(c, color, column, row);
    column += 1;
    if (column == VGA_WIDTH) {
        column = 0;
        row += 1;
        if (row == VGA_HEIGHT)
            row = 0;
    }
}
 
pub fn putString(data: []const u8) void {
    for (data) |c| {
        putChar(c);
    }
}
 
pub const writer = Writer(void, error{}, callback) {
    .context = {}
};
 
fn callback(_: void, string: []const u8) error{}!usize {
    putString(string);
    return string.len;
}
 
pub fn printf(comptime format: []const u8, args: anytype) void {
    fmt.format(writer, format, args) catch unreachable;
}</code></pre><p>Then let's update <code>kernel.zig</code> to display "Hello, world!".</p><p><code>kernel.zig</code></p><pre><code class="language-zig">const console = @import("console.zig");

const ALIGN = 1 &lt;&lt; 0;
const MEMINFO = 1 &lt;&lt; 1;
const MB1_MAGIC: u32 = 0x1BADB002;
const FLAGS: u32 = ALIGN | MEMINFO;
 
const MultibootHeader = packed struct {
    magic: u32 = MB1_MAGIC,
    flags: u32,
    checksum: u32,
};
 
export var multiboot align(4) linksection(".multiboot") = MultibootHeader {
    .flags = FLAGS,
    .checksum = @intCast(u32, ((-(@intCast(i64, MB1_MAGIC) + @intCast(i64, FLAGS))) &amp; 0xFFFFFFFF)),
};
 
export fn _start() callconv(.Naked) noreturn {
    @call(.{ }, main, .{});
    while (true) {}
}

pub fn main() void {
    console.setColors(.White, .Blue);
    console.clear();
    console.putString("Hello, world");
    console.setForegroundColor(.LightRed);
    console.putChar('!');
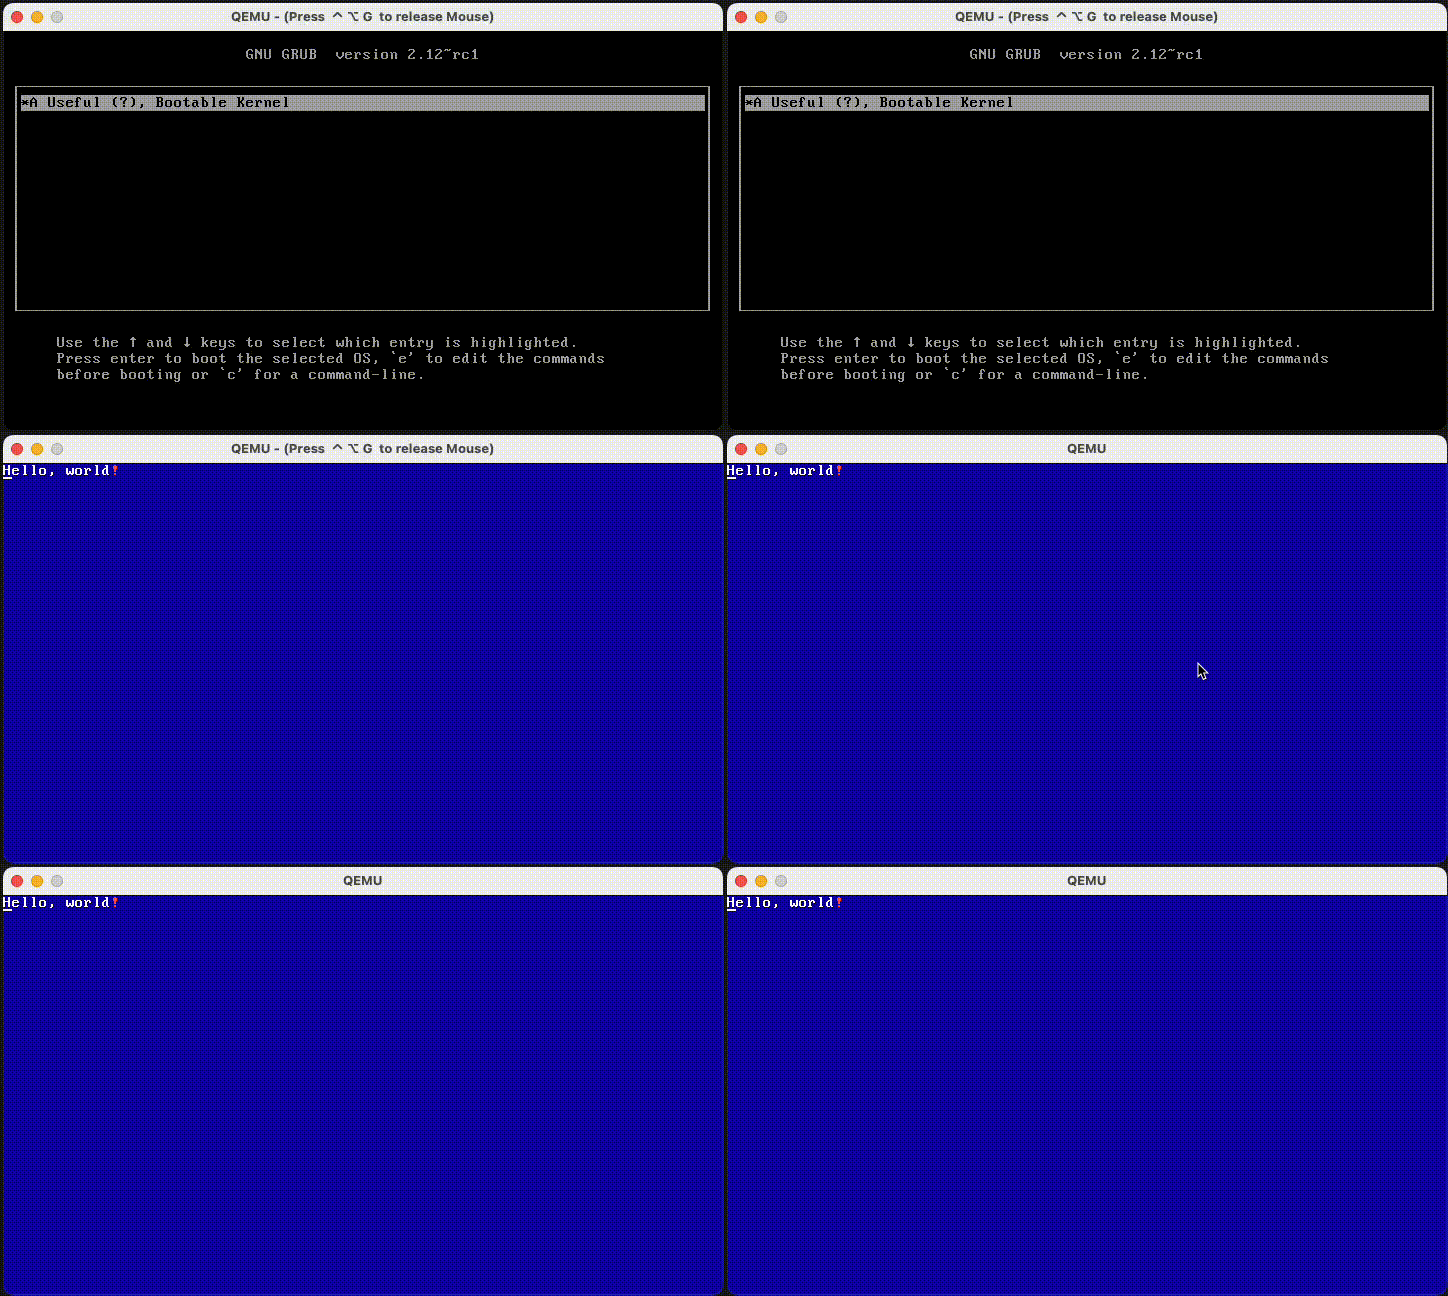
}</code></pre><figure class="kg-card kg-image-card"><figure class="post__image kg-image"><img src="https://austinhanson.com/media/posts/19/image-1.png"  alt loading="lazy" width="832" height="540" sizes="(max-width: 1200px) 100vw, 1200px" srcset="https://austinhanson.com/media/posts/19/responsive/image-1-xs.png 300w ,https://austinhanson.com/media/posts/19/responsive/image-1-sm.png 480w ,https://austinhanson.com/media/posts/19/responsive/image-1-md.png 749w ,https://austinhanson.com/media/posts/19/responsive/image-1-xl.png 1200w"></figure></figure><p>Viola! We have a runnable "kernel" (it's not really a kernel, right? It doesn't do anything useful). But we should probably make it bootable.</p><h3 id="a-useful-bootable-kernel">A Useful (?), Bootable Kernel</h3><p>The last (<em>lol</em>) thing we need to do is make this baby bootable!</p><p>We can use <code>grub-mkrescue</code> to build an ISO that we can then use to boot QEMU from.</p><p>If you're using MacOS there are some dependencies you'll need to get set up. Nothing too crazy, building and "installing" <code>objconv</code> and GRUB2 from source, and installing QEMU.</p><p><code>objconv</code> is surprisingly straight forward:</p><pre><code class="language-bash">cd ~/github
git clone git@github.com:vertis/objconv.git
g++ -o objconv -O2 src/*.cpp
sudo ln -s ~/github/objconv/objconv /usr/local/bin/objconv</code></pre><p>GRUB2 is less so but their <a href="https://wiki.osdev.org/GRUB_2#Installing_GRUB_2_on_OS_X">documentation</a> is <em><a href="https://media.giphy.com/media/QMHoU66sBXqqLqYvGO/giphy.gif">fine</a></em>.</p><pre><code class="language-bash">cd ~/github
git clone git://git.savannah.gnu.org/grub.git
cd grub
./boostrap.sh
./autogen.sh

# Need to be able to build i386 ELF targeted C things
brew tap homebrew/core
brew install i386-elf-binutils i386-elf-gcc
mkdir build
cd build
../configure --disable-werror TARGET_CC=x86_64-elf-gcc TARGET_OBJCOPY=x86_64-elf-objcopy \
	TARGET_STRIP=x86_64-elf-strip TARGET_NM=x86_64-elf-nm TARGET_RANLIB=x86_64-elf-ranlib --target=x86_64-elf

# MacOS has a super old version of awk
brew install gawk
sudo ln -s /opt/homebrew/bin/gawk /usr/local/bin/gawk
export PATH="/usr/local/bin/gawk:$PATH"

make
sudo make install

# GRUB2 needs xorriso (now called mkisofs)
brew install xorriso</code></pre><p>Phew, with that out of the way let's install QEMU.</p><pre><code class="language-bash">brew install qemu</code></pre><p>Alright, now we need a GRUB2 configuration file:</p><p><code>grub.cfg</code></p><pre><code class="language-grub">menuentry "A Useful (?), Bootable Kernel" {
	multiboot /boot/kernel
}</code></pre><p>Ok, now we can finally create our ISO file manually (ick).</p><pre><code class="language-bash">mkdir -p iso_dir
mkdir -p iso_dir/boot/grub/

zig build-exe src/kernel.zig -target i386-freestanding -T src/kernel.ld
cp kernel iso_dir/boot/
cp grub.cfg iso_dir/boot/grub/

grub-mkrescue -o kernel.iso iso_dir</code></pre><p>And then all we have to do is launch QEMU!</p><pre><code class="language-bash">qemu-system-x86_64 -cdrom kernel.iso -debugcon stdio -vga virtio -m 4G -machine "q35" -no-reboot -no-shutdown</code></pre><figure class="kg-card kg-image-card"><figure class="post__image kg-image"><img src="https://austinhanson.com/media/posts/19/kernel.gif"  alt loading="lazy" width="724" height="432"></figure></figure><p>There's more to do here - specifically around automating the entire build process using Zig's build tooling. But I'll leave that for next time.</p>
            ]]>
        </content>
    </entry>
    <entry>
        <title>Migrating from Docker for Mac</title>
        <author>
            <name>Austin Hanson</name>
        </author>
        <link href="https://austinhanson.com/migrating-from-docker-for-mac/"/>
        <id>https://austinhanson.com/migrating-from-docker-for-mac/</id>

        <updated>2021-09-03T10:07:02-05:00</updated>
            <summary type="html">
                <![CDATA[
                    So you don't want to use Docker for Mac anymore, huh? First, let's install docker and virtualbox. brew install docker docker-machine brew install --cask virtualbox Now let's create a "docker machine" using docker-machine. This wraps around virtualbox to spin up a vm (and probably does other stuff). docker-machine create --driver&hellip;
                ]]>
            </summary>
        <content type="html">
            <![CDATA[
                <p>So you don't want to use Docker for Mac anymore, huh?</p><p>First, let's install docker and virtualbox.</p><!--kg-card-begin: markdown--><pre><code class="language-bash">brew install docker docker-machine
brew install --cask virtualbox
</code></pre>
<!--kg-card-end: markdown--><p>Now let's create a "docker machine" using docker-machine. This wraps around virtualbox to spin up a vm (and probably does other stuff).</p><!--kg-card-begin: markdown--><pre><code class="language-bash">docker-machine create --driver virtualbox \
               --virtualbox-cpu-count &quot;4&quot; \
               --virtualbox-memory &quot;8192&quot; \
               default
</code></pre>
<!--kg-card-end: markdown--><p>Now we'll set up a credential store for docker.</p><!--kg-card-begin: markdown--><pre><code class="language-bash">curl -O https://github.com/docker/docker-credential-helpers/releases/download/v0.6.4/docker-credential-osxkeychain-v0.6.4-amd64.tar.gz
tar -xvf docker-credential-osxkeychain-v0.6.4-amd64.tar.gz
sudo mv docker-credential-osxkeychain /usr/local/bin/
sudo chmod +x docker-credential-osxkeychain
sed -i 's/desktop/osxkeychain/g' ~/.docker/config.json
</code></pre>
<!--kg-card-end: markdown--><p>Let's install Kubernetes.</p><!--kg-card-begin: markdown--><pre><code class="language-bash">brew install kubectl minikube
minikube start
</code></pre>
<!--kg-card-end: markdown--><p>And then, if you use zsh / oh-my-zsh, you might like this. (Ok, yes, you can use this with bash too, just put it in the right place)</p><!--kg-card-begin: markdown--><pre><code class="language-bash">cat &lt;&lt;EOF &gt;&gt; ~/.zshrc
docker-start() {
    docker-machine start default
    eval $(docker-machine env default)
}

docker-stop() {
    docker-machine stop default
}

_docker() {
	if [ -z &quot;${DOCKER_HOST}&quot; ]; then
		eval $(docker-machine env)
	fi

	docker &quot;$@&quot;
}
alias docker=_docker
alias d=_docker
alias k=kubectl
EOF
</code></pre>
<!--kg-card-end: markdown--><p>And, finally, if you <em>really, <em>really</em></em>, want to go all out and have docker start on your machine start (which sounds nice but your computer might not like it):</p><p>~/Library/LaunchAgent/com.docker.startup.plist</p><!--kg-card-begin: markdown--><pre><code class="language-xml">&lt;?xml version=&quot;1.0&quot; encoding=&quot;UTF-8&quot;?&gt;
&lt;!DOCTYPE plist PUBLIC &quot;-//Apple//DTD PLIST 1.0//EN&quot; &quot;http://www.apple.com/DTDs/PropertyList-1.0.dtd&quot;&gt;
&lt;plist version=&quot;1.0&quot;&gt;
    &lt;dict&gt;
        &lt;key&gt;EnvironmentVariables&lt;/key&gt;
        &lt;dict&gt;
            &lt;key&gt;PATH&lt;/key&gt;
            &lt;string&gt;/usr/local/bin:/usr/bin:/bin:/usr/sbin:/sbin:&lt;/string&gt;
        &lt;/dict&gt;
        &lt;key&gt;Label&lt;/key&gt;
        &lt;string&gt;com.docker.startup&lt;/string&gt;
        &lt;key&gt;Program&lt;/key&gt;
        &lt;string&gt;/Users/YOURUSERNAME/Library/Application Support/Docker/startup.sh&lt;/string&gt;
        &lt;key&gt;RunAtLoad&lt;/key&gt;
        &lt;true /&gt;
        &lt;key&gt;KeepAlive&lt;/key&gt;
        &lt;false /&gt;
        &lt;key&gt;Disabled&lt;/key&gt;
        &lt;false /&gt;
        &lt;key&gt;LaunchOnlyOnce&lt;/key&gt;
        &lt;true /&gt;
        &lt;key&gt;StandardOutPath&lt;/key&gt;
        &lt;string&gt;/tmp/docker.startup.stdout.log&lt;/string&gt;
        &lt;key&gt;StandardErrorPath&lt;/key&gt;
        &lt;string&gt;/tmp/docker.startup.stderr.log&lt;/string&gt;
    &lt;/dict&gt;
&lt;/plist&gt;
</code></pre>
<!--kg-card-end: markdown--><p>~/Library/Appication Support/Docker/startup.sh</p><!--kg-card-begin: markdown--><pre><code class="language-bash">#!/bin/bash
docker_tag=&quot;Docker&quot;

/usr/local/bin/docker-machine ls --filter &quot;Name=default&quot; --filter &quot;State=Running&quot; -f &quot;{{ .Name }}&quot;
machine_name=`/usr/local/bin/docker-machine ls --filter &quot;Name=default&quot; --filter &quot;State=Running&quot; -f &quot;{{ .Name }}&quot;`

if [[ ( -z &quot;${machine_name}&quot; || &quot;${machine_name}&quot; == &quot;machine does not exist&quot; ) ]]; then
    # Launch the machine
    echo &quot;Starting \`default\` machine&quot; | logger -t &quot;${docker_tag}&quot; -p &quot;user.notice&quot;

    # Redirect stderr to logger user.error
    # Redirect stdout to logger user.notice
    /usr/local/bin/docker-machine start default 2&gt; &gt;(logger -t &quot;${docker_tag}&quot; -p &quot;user.error&quot;) 1&gt; &gt;(logger -t &quot;${docker_tag}&quot; -p &quot;user.notice&quot;)
else
    echo &quot;\`default\` machine is running&quot; | logger -t &quot;${docker_tag}&quot; -p &quot;user.notice&quot; 
fi
</code></pre>
<!--kg-card-end: markdown--><p>Then,</p><!--kg-card-begin: markdown--><pre><code class="language-bash">sudo chmod +x ~/Library/Application Support/Docker/startup.sh
launchctl load -w ~/Library/LaunchAgent/com.docker.startup.plist
</code></pre>
<!--kg-card-end: markdown--><p>You can watch it via <code>log stream | grep -i Docker</code>.</p>
            ]]>
        </content>
    </entry>
    <entry>
        <title>Making a Wi-Fi Smart Fan (Part 1)</title>
        <author>
            <name>Austin Hanson</name>
        </author>
        <link href="https://austinhanson.com/making-a-smart-fan/"/>
        <id>https://austinhanson.com/making-a-smart-fan/</id>
        <media:content url="https://austinhanson.com/media/posts/17/backgroundfan.jpg" medium="image" />

        <updated>2021-05-04T06:59:25-05:00</updated>
            <summary type="html">
                <![CDATA[
                        <img src="https://austinhanson.com/media/posts/17/backgroundfan.jpg" alt="" />
                    A few years ago I started slowly transforming my house into a "Smart House". It started with some friends of ours showing us their smart bulbs and how they could tell Alexa to turn them on and off. I'll admit, I was skeptical of how smart bulbs could be life&hellip;
                ]]>
            </summary>
        <content type="html">
            <![CDATA[
                    <p><img src="https://austinhanson.com/media/posts/17/backgroundfan.jpg" class="type:primaryImage" alt="" /></p>
                <p>A few years ago I started slowly transforming my house into a "Smart House".</p><p>It started with some friends of ours showing us their smart bulbs and how they could tell Alexa to turn them on and off. I'll admit, I was skeptical of how smart bulbs could be life changing, and it took a few years until I would get there.</p><p>But this isn't that story, this is about how I converted my <a href="https://amzn.to/3jYglUv">plain ol' dumb fan</a> into a Wi-Fi enabled smart fan for my <a href="https://www.openhab.org/">OpenHab</a> system. If you aren't familiar with OpenHab I'll be writing up a blog post about it and my system in a while. The tl;dr is that it lets you control <em>your</em> smart home rather than being locked into a service or hardware provider. But be weary, it's not for everyone - the high level of flexibility and control comes with a high level of technical aptitude.</p><p>This will be a multi-part entry. Part 1 (this part) will cover creating a custom Wi-Fi (not ZWave or ZigBee - just Wi-Fi) binding for my smart fan and a start to an Arduino sketch to allow controlling the fan. Part 2 will carry on from there, completing the Arduino sketch and hooking up the controller to the fan. At some point I may combine these into a single blog entry which was my original intent but it just started taking too long and I don't want to forget everything I've done for Part 1.</p><h1 id="building-the-smart-fan-brain">Building the Smart Fan "Brain"</h1><p>For these types of guides, I'm always going to provide the exact list of components I use. There's two reasons for this, first, whenever I run across guides it always seems like people forget to list their components. This makes it <em>extremely</em> difficult to repeat their build. Second, I'm using affiliate links when possible - I don't and won't put ads on my website but affiliate links are innocuous to the end consumer.</p><h2 id="materials">Materials</h2><p>The brain is pretty simple and all of the parts, combined, cost less than $10. Well, sort of, I bought 5x packs of Mini's and Displays at a combine cost of ~$40. You can buy individuals but these things are so useful it's nice to have extra on hand. Let's have a quick look at the BOM:</p><ul><li><a href="https://amzn.to/3jYglUv">Lasko High Velocity Tower Fan</a> (or your fan)</li><li><a href="https://amzn.to/2OIB5nJ">WeMos D1 Mini</a> (~$3/board)</li><li><a href="https://amzn.to/37jHoVb">I2C OLED Display</a> (not necessary; ~$3.50/display)</li></ul><h3 id="the-fan">The Fan</h3><p>The fan doesn't <em>really</em> matter. Not for the controller logic of the smart fan. It will matter in Part 2 when we start integrating the brain with the fan itself as we'll need a way to determine and control the fan's state. But most fans should be able to be controlled. It's just a matter of figuring out how.</p><p>For this post, I'll be integrating with our Lasko fan that we use when we sleep for "white noise" and air circulation. For what it's worth, it's a <em>great</em> fan and <em>blows</em> very well. Unfortunately, it also <em>sucks</em> because the power button resets if the device loses power - thus I can't just use a smart switch or outlet to turn it on/off.</p><h3 id="wemos-d1-mini">WeMos D1 Mini</h3><p>This D1 Mini is a <a href="https://www.wemos.cc/en/latest/d1/d1_mini.html">"WeMos" compatible board</a> - which is to say it's not the original <a href="https://www.wemos.cc">"LOLIN" board</a>. It uses the <a href="https://en.wikipedia.org/wiki/ESP8266">ESP8266 Wi-Fi chip</a> which features a full TCP/IP stack so you can dive right into the IOT life. It's specs are pretty sweet:</p><ul><li>11 digital IO, interrupt/pwm/I2C/one-wire supported(except D0)</li><li>1 analog input(3.2V max input)</li><li>a Micro USB connection</li><li>Compatible with MicroPython, Arduino, nodemcu</li></ul><p>All five of my boards worked on arrival but some reviewers weren't so lucky. One thing I'll point out, with most of these kits, sensors, actuators, etc, the documenation and printed labels aren't <em>necessarily</em> always accurate. For example, some OLED I²C displays show SCK/SDA versus SCL/SDA (the write pins for I²C). These types of discrepencies might be the reason some "components" don't work. That or the hardware is just bad - that happens a lot too.</p><h3 id="i-c-oled-display">I²C OLED Display</h3><p>You don't <em>need</em> a display but developing your own hardware is a lot more rewarding when you have instantaneous feedback (you know, like software). Not to mention, these displays are <strong>cheap</strong> so you might as well just have a few around. It's uses <a href="https://en.wikipedia.org/wiki/I%C2%B2C">I²C (Inter-Integrated Communication)</a> to talk with the D1 Mini which means it only use up two pins versus <a href="https://en.wikipedia.org/wiki/Serial_Peripheral_Interface">SPI's (Serial Peripheral Interface)</a> four pins. That'll make a difference when we get to reading the fan's state (more on that in Part 2).</p><p>This display is <em>small</em> so you might look at grabbing something bigger depending on your application. With that said, it is perfect for these types of small controller applications so if you're smartifying a fan and you don't want to spend an arm and a leg, pick some of these up.</p><p>That's <em>basically</em> it for Part 1 but we'll <em>probably</em> need a few more things for Part 2. I'll update this list when we get there but it's probably not going cost more than a few dollars for the rest of the components.</p><h2 id="openhab-the-iot-hub">OpenHab - The IOT "Hub"</h2><p>OpenHab is an awesome piece of software that abstracts away nearly all of the complexities of controlling your smart devices. One of those abstractions are bindings:</p><blockquote>A binding is an extension to openHAB that integrates an external system like a software service or a hardware device. The external system is represented as a set of <em>Things</em> and sometimes <em>Bridges</em> with <em>Channels</em>.</blockquote><p>Well, that sounds like exactly what we need!</p><p>OpenHab is currently in version 3 as of writing this article. My OpenHab system runs OpenHab2 which supports version 1 and version 2 bindings. For this article, I'm going to focus on writing an OpenHab2 binding (because that's what I'm using). However, I'm reasonably confident the binding will work with OpenHab3 (although they are deprecating version 1 support with 3) and they've provided a <a href="https://community.openhab.org/t/guide-binding-development-changes-for-openhab-3-from-2-5-x/104134">detailed guide</a> on migrating version 2 bindings to version 3.</p><p>Let's get started.</p><h3 id="creating-your-custom-binding">Creating Your Custom Binding</h3><p>OpenHab3 introduces a nice <a href="https://github.com/openhab/openhab-addons/blob/main/bundles/create_openhab_binding_skeleton.sh">shell script</a> to create a templated out binding. Unfortunately, that doesn't exist in the latest OpenHab2 tag so we get to do it the ol' fashioned way - copying an existing one.</p><p>I should note, you could use the OpenHab3 script to create your binding and then convert it back to an OpenHab2 variant. That's probably possible but I wasn't able to get it to work. That was before finding the <a href="https://community.openhab.org/t/guide-binding-development-changes-for-openhab-3-from-2-5-x/104134">detailed guide</a> on the conversion and I'm sure I missed a couple things.</p><p>First thing's first, let's get our development environment set up:</p><figure class="kg-card kg-code-card"><pre><code class="language-bash"># Install JDK11
brew tap adoptopenjdk/openjdk
brew install --cask adoptopenjdk11

# Install Maven 3.X
brew install maven@3.5
export PATH="/usr/local/opt/maven@3.5/bin:$PATH" &gt;&gt; ~/.zshrc</code></pre><figcaption>Set up the OpenHab dev environment</figcaption></figure><p>Ok, cool, let's grab the code:</p><figure class="kg-card kg-code-card"><pre><code class="language-bash"># Clone the OpenHab2 Addons repo (you might fork it yourself)
git clone -b 2.5.12 git@github.com:berdon/openhab-addons.git
export JAVA_HOME=`/usr/libexec/java_home -v 11.0.10`</code></pre><figcaption>Clone the OpenHab Addons repo</figcaption></figure><p>And, finally, let's copy some existing Addon. There's a lot, you could pick any, I chose the Autelis binding.</p><pre><code class="language-bash">cd openhab-addons
cp -R bundles/org.openhab.binding.autelis bundles/org.openhab.binding.someidentifier</code></pre><p>There's a few i's and t's to dot and cross:</p><ol><li>Add <code>/bundles/org.openhab.binding.someidentifier @you</code> to <code>CODEOWNERS</code></li><li>Add a <code>&lt;dependency&gt;</code> block for your binding to <code>bom/openhab-addons/pom.xml</code></li><li>Add a <code>&lt;module&gt;</code> block for your binding to <code>bundles/pom.xml</code></li><li>Find and replace all instances of <code>org.openhab.binding.autelis</code> within your binding and replace it with <code>org.openhab.binding.someidentifier</code></li></ol><p>And with that you should be ready to go! Now, before we do too much else, let's consider some of our options for communicating with our custom controller.</p><h2 id="iot-communication">IoT Communication</h2><p>There are a small number of standard ways most devices use for discovery and communication:</p><ul><li>Z-Wave</li><li>ZigBee</li><li>Wi-Fi</li></ul><p><a href="https://en.wikipedia.org/wiki/Z-Wave">Z-Wave</a> is a mesh-network based protocol using a ~800-900 MHz band for communication with a range of 30-100m and supports up to 232 devices per network. It's been sold to various companies and is a closed protocol.</p><p><a href="https://en.wikipedia.org/wiki/Zigbee">ZigBee</a> is <em>also</em> a mesh-network based "specification" but uses a 2.4 GHz band so it could <em>potentially</em> conflict with Wi-Fi networks. It supports up to 65,000 devices and ranges of 75-300m. It's an open specification defined in <a href="https://en.wikipedia.org/wiki/IEEE_802.15.4">IEEE 802.15.4</a>.</p><p>Wi-FI...can either use something like <a href="https://en.wikipedia.org/wiki/Simple_Service_Discovery_Protocol">SSDP (Simple Service Discovery Protocol)</a> via something like UPnP or...anything else you want. Given the practically limitless possibilities of socket communication, TCP/IP, etc, you could just about do whatever you want.</p><p>But it's a lot faster to stand on the shoulder of giants so we'll just use SSDP/UPnP for discovery and then Rest-ish HTTP endpoints for communication. Not to mention if you want to use Z-Wave or ZigBee we'd need to buy <a href="https://amzn.to/3q69Ss1">this chip</a> that we can interface with the D1 Mini and that just adds more cost, complexity, etc. It's maybe not a <em>terrible</em> idea because then you can just use the ZigBee Binding for OpenHab but then you get to spend an extra $10, miss out on learning something, <em>and</em> let's not forget you need a Z-Wave or ZigBee hub. Trade-offs trade-offs...</p><p>Either way, you're reading what I did and I chose to use Wi-Fi. Though I might write something later about interfacing with the <a href="https://amzn.to/3q69Ss1">Gowoops CC2530</a> because I <em>do</em> have a ZigBee hub (<a href="https://amzn.to/3uMcqiF">Raspberry Pi</a> + <a href="https://amzn.to/3dZS3sa">ZigBee dongle</a>) and I <em>did</em> already buy them...</p><p>Let's look at setting up a discoverable SSDP device on the D1 Mini.</p><h2 id="getting-started-with-the-d1-mini">Getting Started With the D1 Mini</h2><p>First, make sure you have the <a href="https://www.arduino.cc/en/Main.Software">Arduino IDE</a>. It's a little buggy and...weird but it gets the job done.</p><p>Next, you'll want to install the "esp8266" boards in your board manager:</p><!--kg-card-begin: markdown--><ul>
<li>Tools -&gt; Boards -&gt; Board Manager</li>
<li>Search for &quot;esp8266&quot;
<ul>
<li>It will be the one by the &quot;ESP8266 Community&quot;</li>
</ul>
</li>
<li>Click Install</li>
</ul>
<!--kg-card-end: markdown--><p>Now go to to <strong>Tools -&gt; Boards</strong> and select the "WeMos D1 Mini" which opens up a broad set of file menus allowing you to select various libraries specific to the D1 Mini. Huzza!</p><h3 id="making-a-discoverable-thing">Making a Discoverable "Thing"</h3><p>It's super simple, actually. There is a Wi-Fi library and an SSDP library you can add that covers basically everything for you.</p><p>You can see a sample sketch of using SSDP by going to <strong>File -&gt; Examples -&gt; ESP8266SSDP -&gt; SSDP</strong>. That will open up a tab with a new complete sketch that looks a whole lot like:</p><figure class="kg-card kg-code-card"><pre><code class="language-c">#include &lt;ESP8266WiFi.h&gt;
#include &lt;ESP8266WebServer.h&gt;
#include &lt;ESP8266SSDP.h&gt;

#ifndef STASSID
#define STASSID "your-ssid"
#define STAPSK  "your-password"
#endif

const char* ssid = STASSID;
const char* password = STAPSK;

ESP8266WebServer HTTP(80);

void setup() {
  Serial.begin(115200);
  Serial.println();
  Serial.println("Starting WiFi...");

  WiFi.mode(WIFI_STA);
  WiFi.begin(ssid, password);
  if (WiFi.waitForConnectResult() == WL_CONNECTED) {

    Serial.printf("Starting HTTP...\n");
    HTTP.on("/index.html", HTTP_GET, []() {
      HTTP.send(200, "text/plain", "Hello World!");
    });
    HTTP.on("/description.xml", HTTP_GET, []() {
      SSDP.schema(HTTP.client());
    });
    HTTP.begin();

    Serial.printf("Starting SSDP...\n");
    SSDP.setSchemaURL("description.xml");
    SSDP.setHTTPPort(80);
    SSDP.setName("Philips hue clone");
    SSDP.setSerialNumber("001788102201");
    SSDP.setURL("index.html");
    SSDP.setModelName("Philips hue bridge 2012");
    SSDP.setModelNumber("929000226503");
    SSDP.setModelURL("http://www.meethue.com");
    SSDP.setManufacturer("Royal Philips Electronics");
    SSDP.setManufacturerURL("http://www.philips.com");
    SSDP.begin();

    Serial.printf("Ready!\n");
  } else {
    Serial.printf("WiFi Failed\n");
    while (1) {
      delay(100);
    }
  }
}

void loop() {
  HTTP.handleClient();
  delay(1);
}</code></pre><figcaption>Example SSDP Sketch for the D1 Mini</figcaption></figure><p>So what's exactly happening in the above code? Let's break it down:</p><ul><li>Lines 1-3 include the various "libraries" we need to set up a Wi-Fi connection and create an SSDP device</li><li>Lines 5-11 set up our Wi-Fi particulars</li><li>Lines 20-22 connect to your Wi-Fi</li><li>Lines 24-31 create a HTTP web server that hosts the necessary routes to answer SSDP/UPnP requests</li><li>Lines 33-44 set up the SSDP particulars</li><li>Lines 55-58 ensure that new HTTP requests are handled</li></ul><p>We have what we need to create a discoverable device and host a web server to handle arbitrary requests. But what are we doing with those OLED displays?</p><h3 id="using-an-oled-display">Using an OLED Display</h3><p>Turns out those are super simple to use too! Let's go to <strong>Tools -&gt; Library Manager</strong> and find and install "ESP8266 and ESP32 OLED driver for SSD1306" displays by "ThingPulse, by Fabrice Weinberg".</p><p>Then you can see a sample sketch by going to <strong>File -&gt; Examples -&gt; ESP8266 and ESP32 OLED driver for SSD1306 displays -&gt; SSD1306SimpleDemo</strong>. The demo is a bit too complex to include here but the useful bits are:</p><pre><code class="language-c">// Libraries for the display
#include &lt;Wire.h&gt;               // Only needed for Arduino 1.6.5 and earlier
#include "SSD1306Wire.h"        // legacy: #include "SSD1306.h"

// The I2C OLED Interface
SSD1306Wire display(0x3c, SDA, SCL);

void setup() {
  // Initialising the UI will init the display too.
  display.init();
  display.flipScreenVertically();
  display.setFont(ArialMT_Plain_10);
  
  // Display some text
  display.setTextAlignment(TEXT_ALIGN_LEFT);
  display.drawString(0, 0, "Hello world");
}

void loop()
{
}</code></pre><p>All in all, not too complicated. We include the libraries we need, instantiate a <code>display</code> OLED interface variable, and call some setup routines to get the display ready.</p><p>Believe it or not that's all the building blocks we need to build a simple fan controller.</p><h3 id="getting-started-with-discovery">Getting Started with Discovery</h3><p>Let's start with the a "shell" of a discoverable (using SSDP) device:</p><pre><code class="language-c">#include &lt;ESP8266WiFi.h&gt;        // WiFi
#include &lt;ESP8266WebServer.h&gt;   // HTTP Web Server
#include &lt;ESP8266SSDP.h&gt;        // UPnP/SSDP
#include &lt;Wire.h&gt;
#include "roboto_mono_light.h"  // Font
#include "SSD1306Wire.h"        // OLED Display

#ifndef STASSID
#define STASSID "your-ssid"
#define STAPSK  "your-password"
#endif

const char* ssid = STASSID;
const char* password = STAPSK;

// The I2C OLED Interface
SSD1306Wire display(0x3c, SDA, SCL);

// Handle for the WebServer
ESP8266WebServer HTTP(80);

// WiFi connectivity state
bool wifiConnected = false;

/**
 * DisplayText
 */
void UpdateOLEDDisplay(const char* message)
{
  display.clear();
  display.setTextAlignment(TEXT_ALIGN_LEFT);
  display.drawStringMaxWidth(0, 0, 128, message);
  display.display();
}

/**
 * Initializes:
 *  - Serial
 *  - OLED Display
 *  - WiFi connection
 *  - HTTP WebServer
 *  - UPnP/SSDP
 */
void setup() {
  // Initialize our serial output
  Serial.begin(9600);

  InitializeDisplay();
  
  Serial.println();
  Serial.printf("Connecting to WiFi...");
  UpdateOLEDDisplay("Connecting...");

  // Connect to WiFi
  WiFi.mode(WIFI_STA);
  WiFi.begin(ssid, password);
  if (WiFi.waitForConnectResult() == WL_CONNECTED) {
    Serial.printf("Done\n");
    UpdateOLEDDisplay("Connecting...Done");
    wifiConnected = true;

    InitializeWebServer();
    InitializeSSDP();
  }
  else
  {
    Serial.printf("WiFi Failed\n");
    UpdateOLEDDisplay("Connecting...Failed");
    while (1)
    {
      delay(100);
    }
  }
}

/**
 * Initialize the display and set the font.
 */
void InitializeDisplay()
{
  // Initialising the UI will init the display too.
  display.init();

  display.flipScreenVertically();
  display.setFont(Roboto_Mono_Light_Small);
}

/**
 * Initialize the HTTP WebServer, setup the available routes
 * AND, the bulk of the work, rig the routes to their respective
 * fan controller business logic.
 */
void InitializeWebServer()
{
  Serial.printf("Starting HTTP WebServer...");
  UpdateOLEDDisplay("Starting WebServer...");

  // Used for UPnP/SSDP
  HTTP.on("/description.xml", HTTP_GET, []() {
    SSDP.schema(HTTP.client());
  });

  // TODO: Set up HTTP endpoints to control various fan things here
  
  HTTP.begin();
  Serial.printf("Done\n");
  UpdateOLEDDisplay("Starting WebServer...Done");
}

/**
 * Setup the UPnP/SSDP for client discovery.
 */
void InitializeSSDP()
{
  Serial.printf("Starting UPNP/SSDP...");
  UpdateOLEDDisplay("Starting UPNP/SSDP...");

  // Set the SSDP schema particulars
  SSDP.setDeviceType("urn:schemas-upnp-org:device:ahfan:1");
  SSDP.setSchemaURL("description.xml");
  SSDP.setHTTPPort(80);
  SSDP.setName("Smart Fan");
  SSDP.setSerialNumber("000000000001");
  SSDP.setURL("index.html");
  SSDP.setModelName("Smart Fan");
  SSDP.setModelNumber("1");
  SSDP.setModelURL("http://austinhanson.com");
  SSDP.setManufacturer("AH Fans");
  SSDP.setManufacturerURL("http://austinhanson.com");
  SSDP.begin();

  Serial.printf("Done\n");
  UpdateOLEDDisplay("Starting UPNP/SSDP...Done");
}

void loop() {
  HTTP.handleClient();
  delay(1);
}</code></pre><p>And now we have a discoverable "Smart Fan" controller that drives an OLED display! Let's have a look at our handiwork:</p><figure class="kg-card kg-image-card"><figure class="post__image kg-image"><img src="https://austinhanson.com/media/posts/17/IMG-6660-1.gif"  alt loading="lazy" width="233" height="235"></figure></figure><p>If you watch carefully enough you can see the OLED display transitioning through the various setup steps. Of course, you can also just check the serial output for the full output but that's not nearly as exciting as writing to a display!</p><p>You might be thinking, "Ok? I see text but did we actually make a device that other things can find?" Yes, yes we did! We can use a tool like <a href="https://ssdpy.readthedocs.io/en/latest/index.html">SSDPy</a> to query our device:</p><pre><code class="language-bash">pip install ssdpy
ssdpy-discover urn:schemas-upnp-org:device:ahfan:1

{'cache-control': 'max-age=1200',
 'ext': '',
 'location': 'http://192.168.0.45:80/description.xml',
 'server': 'Arduino/1.0 UPNP/1.1 Smart Fan/1',
 'st': 'urn:schemas-upnp-org:device:ahfan:1',
 'usn': 'uuid:38323636-4558-4dda-9188-cda0e67ab9a3'}</code></pre><p>You don't have to query the device specifically, you could do <code>ssdpy-discover ssdp:all</code> but you'll probably get a <em>lot</em> more results.</p><p>Now that we have a simple shell with most of the useful bits we need, let's start on the actual fan controller. Coming soon in part 2!</p>
            ]]>
        </content>
    </entry>
    <entry>
        <title>Properties in C++20</title>
        <author>
            <name>Austin Hanson</name>
        </author>
        <link href="https://austinhanson.com/properties-in-c-plus-plus-20/"/>
        <id>https://austinhanson.com/properties-in-c-plus-plus-20/</id>
        <media:content url="https://austinhanson.com/media/posts/16/photo-1498050108023-c5249f4df085" medium="image" />

        <updated>2021-03-04T07:08:00-06:00</updated>
            <summary type="html">
                <![CDATA[
                        <img src="https://austinhanson.com/media/posts/16/photo-1498050108023-c5249f4df085" alt="" />
                    C++ doesn't support getter/setter style properties. But you can get pretty darn close with templates or macros. #include &lt;iostream&gt; #include "properties.h" using namespace std; class User { private: int mId; int mWeight; int mPurse; int mBank; public: // Non-auto property only supporting get (runtime check) Property&lt;int&gt; Id{{ .get = mId&hellip;
                ]]>
            </summary>
        <content type="html">
            <![CDATA[
                    <p><img src="https://austinhanson.com/media/posts/16/photo-1498050108023-c5249f4df085" class="type:primaryImage" alt="" /></p>
                <p>C++ doesn't support getter/setter style properties. But you can get <em>pretty</em> darn close with templates or macros.</p><pre><code class="language-cpp">#include &lt;iostream&gt;
#include "properties.h"

using namespace std;

class User
{
private:
  int mId;
  int mWeight;
  int mPurse;
  int mBank;
public:
  // Non-auto property only supporting get (runtime check)
  Property&lt;int&gt; Id{{ .get = mId }};
  Property&lt;int&gt; Purse {{ .set = mPurse }};
  Property&lt;int&gt; Bank {{ .set = mBank }};

  Property&lt;int&gt; Wealth {{ .get = [this]() { return mPurse + mBank; }}};

  // Auto-properties
  Property&lt;string&gt; FirstName;
  Property&lt;string&gt; LastName;

  // Non-auto property
  Property&lt;string&gt; FullName {{
    .get = [this]() { return LastName + string(", ") + FirstName; }
  }};

  // Property backed by member variables
  Property&lt;int&gt; Weight { mWeight };

  // Non-auto property with value checks
  Property&lt;int&gt; Age {{
    .get = [](int value) { return value; },
    .set = [](int&amp; value, int newValue) {
      if (newValue &lt; 0) newValue = 0;
      if (newValue &gt; 150) newValue = 150;
      return value = newValue;
    }
  }};

  User(int id) { mId = id; }
};

int main()
{
  auto user = User(0);
  cout &lt;&lt; "First Name: ";
  cin &gt;&gt; user.FirstName;
  cout &lt;&lt; "Last Name: ";
  cin &gt;&gt; user.LastName;
  user.Age = 46;
  cout &lt;&lt; "Full Name: " &lt;&lt; user.FullName &lt;&lt; endl;
  user.Age++;
  cout &lt;&lt; "Age: " &lt;&lt; user.Age &lt;&lt; endl;
  // user.Id = 10; // Throws an exception
  user.Weight = 205;
  user.Purse = 20;
  user.Bank = 100;
  cout &lt;&lt; "Wealth: " &lt;&lt; user.Wealth;
  // user.Wealth = 100; // Throws an exception
}</code></pre><p>It's not perfect but it's close.</p><p>We can get the above by extending Peter Dimov's <a href="https://pdimov.github.io/blog/2020/09/07/named-parameters-in-c20/">Named Parameters in C++20</a> post and the templating approach for C++ properties on <a href="https://en.wikipedia.org/wiki/Property_%28programming%29#C++">Wikipedia</a>:</p><figure class="kg-card kg-code-card"><pre><code class="language-cpp">#include &lt;iostream&gt;

#pragma GCC diagnostic push
#pragma GCC diagnostic ignored "-Wreturn-stack-address"

template &lt;typename T&gt;
class Property
{
  T _value;
  bool _isAuto = true;
  /**
   * Used for auto-property behavior.
   */
  std::function&lt;const T&amp;(const T&amp;)&gt; _autoGetter = [](const T&amp; value) -&gt; const T&amp; { return value; };
  std::function&lt;const T&amp;(T&amp;, const T&amp;)&gt; _autoSetter = [](T&amp; value, const T&amp; newValue) -&gt; const T&amp; { return value = newValue; };

  /**
   * Used for non-auto property behavior.
   */
  std::function&lt;const T&amp;()&gt; _getter;
  std::function&lt;const T&amp;(const T&amp;)&gt; _setter;

  /**
   * Convenience methods for calling the actual setter/getters regardless of auto-property
   * or not.
   */
  const T&amp; set(const T&amp; value) { return _isAuto ? _autoSetter(_value, value) : _setter(value); }
  const T&amp; get() { return _isAuto ? _autoGetter(_value) : _getter(); }

public:

  struct AutoParams {
    std::function&lt;const T&amp;(const T&amp;)&gt; get = [](const T&amp; value) { return value; };
    std::function&lt;const T&amp;(T&amp;, const T&amp;)&gt; set = [](T&amp; value, const T&amp; newValue) { return value = newValue; };
  };

  struct Params {
    std::function&lt;const T&amp;()&gt; get = []() -&gt; const T&amp; { throw new std::exception(); };
    std::function&lt;const T&amp;(const T&amp;)&gt; set = [](const T&amp; value) -&gt; const T&amp; { throw new std::exception(); };
  };

  struct WrappedGetParams {
    T&amp; get;
  };

  struct WrappedSetParams {
    T&amp; set;
  };

  // Implicit conversion back to T.
  operator const T&amp; () { return get(); }

  const T operator=(T other) { return set(other); }
  const T operator=(Property&lt;T&gt; other) { return set(other.get()); }

  Property&lt;T&gt;&amp; operator++() { return set(get()++); }
  T operator++(int n) {
    return set(get() + (n != 0 ? n : 1));
  }
  Property&lt;T&gt;&amp; operator--() { return set(get()--); }
  T operator--(int n) {
    return set(get() - (n != 0 ? n : 1));
  }
  
  const T&amp; operator+=(const T&amp; other) { return set(get() + other); }
  const T&amp; operator-=(const T&amp; other) { return set(get() - other); }

  const T&amp; operator+(const T&amp; other) { return get() + other; }
  friend const T&amp; operator+(const T&amp; first, Property&lt;T&gt;&amp; other) { return first + other.get(); }

  const T&amp; operator-(const T&amp; other) { return get() - other; }
  friend const T&amp; operator-(const T&amp; first, Property&lt;T&gt;&amp; other) { return first - other.get(); }

  const T&amp; operator*(const T&amp; other) { return get() * other; }
  friend const T&amp; operator*(const T&amp; first, Property&lt;T&gt;&amp; other) { return first * other.get(); }

  const T&amp; operator/(const T&amp; other) { return get() / other; }
  friend const T&amp; operator/(const T&amp; first, Property&lt;T&gt;&amp; other) { return first / other.get(); }

  friend std::ostream&amp; operator&lt;&lt;(std::ostream&amp; os, Property&lt;T&gt;&amp; other) { return os &lt;&lt; other.get(); }
  friend std::istream&amp; operator&gt;&gt;(std::istream&amp; os, Property&lt;T&gt;&amp; other) {
    if (other._isAuto) {
      return os &gt;&gt; other._value;
    }
    else {
      T ref;
      os &gt;&gt; ref;
      other.set(ref);
      return os;
    }
  }

  // This template class member function template serves the purpose to make
  // typing more strict. Assignment to this is only possible with exact identical types.
  // The reason why it will cause an error is temporary variable created while implicit type conversion in reference initialization.
  template &lt;typename T2&gt; T2&amp; operator=(const T2&amp; other)
  {
    T2&amp; guard = _value;
    throw guard; // Never reached.
  }

  Property() {}

  Property(T&amp; value)
  {
    _isAuto = false;
    _getter = [&amp;]() -&gt; const T&amp; { return value; };
    _setter = [&amp;](const T&amp; newValue) -&gt; const T&amp; { return value = newValue; };
  }

  Property(AutoParams params)
  {
    _isAuto = true;
    _autoGetter = params.get;
    _autoSetter = params.set;
  }

  Property(Params params)
  {
    _isAuto = false;
    _getter = params.get;
    _setter = params.set;
  }

  Property(WrappedGetParams params)
  {
    _isAuto = false;
    auto get = params.get;
    _getter = [get]() { return get; };
    _setter = [](const T&amp; newValue) -&gt; const T&amp; { throw new std::exception(); };
  }

  Property(WrappedSetParams params)
  {
    _isAuto = false;
    T&amp; set = params.set;
    _getter = []() -&gt; const T&amp; { throw new std::exception(); };
    _setter = [&amp;set](const T&amp; newValue) { return set = newValue; };
  }
};

#pragma GCC diagnostic pop</code></pre><figcaption>See this <a href="https://gist.github.com/berdon/98f8c5bc631afa9542b2705617812d4f">gist</a> on GitHub</figcaption></figure>
            ]]>
        </content>
    </entry>
    <entry>
        <title>Getting MacOS BigSur + ESP8266 to Play Nice</title>
        <author>
            <name>Austin Hanson</name>
        </author>
        <link href="https://austinhanson.com/getting-macos-bigsur-esp8266-to-play-nice/"/>
        <id>https://austinhanson.com/getting-macos-bigsur-esp8266-to-play-nice/</id>

        <updated>2021-01-29T20:55:00-06:00</updated>
            <summary type="html">
                <![CDATA[
                    I ran across The "do not be alarmed" clock on HackerNews and thought that would be a fun little project to play around with. It's been an awful long time since I've done anything with hardware and I haven't played with anything "Arduino" yet so I made my way over&hellip;
                ]]>
            </summary>
        <content type="html">
            <![CDATA[
                <p>I ran across <a href="https://www.stavros.io/posts/do-not-be-alarmed-clock/">The "do not be alarmed" clock</a> on <a href="https://news.ycombinator.com/item?id=25902165">HackerNews</a> and thought that would be a fun little project to play around with. It's been an awful long time since I've done anything with hardware and I haven't played with anything "Arduino" yet so I made my way over to Amazon and picked up:</p><ul><li><a href="https://www.amazon.com/gp/product/B081PX9YFV/ref=ppx_yo_dt_b_asin_title_o03_s00?ie=UTF8&amp;psc=1">NodeMcu Mini D1 (WeMos D1 Mini) x5</a></li><li><a href="https://www.amazon.com/gp/product/B08LYL7QFQ/ref=ppx_yo_dt_b_asin_title_o02_s00?ie=UTF8&amp;psc=1">OLED 128x64 SSD1306 I2C Self-Luminous Display</a></li><li><a href="https://www.amazon.com/gp/product/B01ERP6WL4/ref=ppx_yo_dt_b_asin_title_o01_s00?ie=UTF8&amp;psc=1">ELEGOO Electronic Fun Kit Bundle</a></li></ul><p>The only thing that has come in the mail thus far was the immediately useful thing, the Mini D1 board. Getting that to work on my MacOS (running BigSur) wasn't <em>uneventful</em> but as far as these things go it was relatively easy.</p><p><strong>First</strong>, download and install the <a href="https://www.arduino.cc/en/guide/macOSX">Arduino IDE</a> for MacOS.</p><p>So far, so good.</p><p><strong>Second</strong>, Download and install the <a href="https://www.wemos.cc/en/latest/ch340_driver.html">WeMos D1 Mini Drivers</a></p><p>MacOS is going to complain that it blocked an extension from being installed. I went down a long rabbit trail here worried that something wasn't installed. If you do some digging you'll find a <code>ReadMe.PDF</code> with the driver download that mentions usbserial.kext in <code>/Library/Extensions</code> and <code>/System/Library/Extensions</code>.</p><p>It seems like the extension was installed in <code>Library/Extensions</code> and wasn't in <code>/System/Library/Extensions</code>. <em>Don't worry though</em>, it turns out that it doesn't matter and things will just work. Don't waste time, like I did, trying to get the <code>.kext</code> into the System directory. I didn't have much luck but I think I probably needed to disable the System Integrity Protection. Meh.</p><p><strong>Third</strong>, setup your Arduino IDE to work with the ESP8266:</p><p>Add the following URL to <strong>Arduino -&gt; Preferences -&gt; Additional Board Manager URLs</strong>:<br><code>http://arduino.esp8266.com/stable/package_esp8266com_index.json</code></p><figure class="kg-card kg-image-card"><figure class="post__image kg-image"><img src="https://austinhanson.com/media/posts/15/hhqqxnTWGPk1PsKP1RPZ7p0xspap_small.png"  alt="Screen Shot 2021-01-29 at 10.50.00 PM.png" loading="lazy" sizes="(max-width: 1200px) 100vw, 1200px" srcset="https://austinhanson.com/media/posts/15/responsive/hhqqxnTWGPk1PsKP1RPZ7p0xspap_small-xs.png 300w ,https://austinhanson.com/media/posts/15/responsive/hhqqxnTWGPk1PsKP1RPZ7p0xspap_small-sm.png 480w ,https://austinhanson.com/media/posts/15/responsive/hhqqxnTWGPk1PsKP1RPZ7p0xspap_small-md.png 749w ,https://austinhanson.com/media/posts/15/responsive/hhqqxnTWGPk1PsKP1RPZ7p0xspap_small-xl.png 1200w"></figure></figure><p><strong>Fourth</strong>, install the ESP8266 "board" using <strong>Tools -&gt; Board: -&gt; Board Manager</strong>. Search for "ESP8266" (you might need to do this a couple times) and then a single entry should pop up called "esp8266" by "ESP8266 Community".</p><figure class="kg-card kg-image-card"><figure class="post__image kg-image"><img src="https://austinhanson.com/media/posts/15/aMXQDaD1QSua7N7ny21fsr0xspap_small.png"  alt="Screen Shot 2021-01-29 at 10.48.43 PM.png" loading="lazy" sizes="(max-width: 1200px) 100vw, 1200px" srcset="https://austinhanson.com/media/posts/15/responsive/aMXQDaD1QSua7N7ny21fsr0xspap_small-xs.png 300w ,https://austinhanson.com/media/posts/15/responsive/aMXQDaD1QSua7N7ny21fsr0xspap_small-sm.png 480w ,https://austinhanson.com/media/posts/15/responsive/aMXQDaD1QSua7N7ny21fsr0xspap_small-md.png 749w ,https://austinhanson.com/media/posts/15/responsive/aMXQDaD1QSua7N7ny21fsr0xspap_small-xl.png 1200w"></figure></figure><p><strong>Fifth</strong>, we need to do some patching to some random ESP8266 python code.</p><p><code>vi ~/Library/Arduino15/packages/esp8266/hardware/esp8266/2.7.4/tools/pyserial/serial/tools/list_ports_osx.py</code></p><p>Comment out lines 29 and 30 and add the following afterwards:</p><pre><code class="language-python">iokit = ctypes.cdll.LoadLibrary('/System/Library/Frameworks/IOKit.framework/IOKit')
cf = ctypes.cdll.LoadLibrary('/System/Library/Frameworks/CoreFoundation.framework/CoreFoundation')
</code></pre><p><strong>Finally</strong>, you can test your board by loading the Blink example sketch via <strong>File -&gt; Examples -&gt; ESP8266 -&gt; Blink</strong>. Click the right arrow near the top left and your ESP8266 board should start blinking after a few moments.</p><p>Special thanks to <a href="https://averagemaker.com/2018/03/wemos-d1-mini-setup.html">AverageMaker's</a> WeMos D1 Mini guide and the <a href="https://forum.arduino.cc/index.php?topic=702144.0">Arduino forums</a> for making this setup take ~15 minutes.</p>
            ]]>
        </content>
    </entry>
    <entry>
        <title>Building a Custom Shelf for My Daughter</title>
        <author>
            <name>Austin Hanson</name>
        </author>
        <link href="https://austinhanson.com/building-a-custom-shelf/"/>
        <id>https://austinhanson.com/building-a-custom-shelf/</id>
        <media:content url="https://austinhanson.com/media/posts/14/IMG_9249-1.JPG" medium="image" />

        <updated>2020-08-26T12:00:00-05:00</updated>
            <summary type="html">
                <![CDATA[
                        <img src="https://austinhanson.com/media/posts/14/IMG_9249-1.JPG" alt="" />
                    So we're expecting a baby here in the next week or two and my wife wanted a shelf/armoire/ambry(?) thing that matched our crib and changing dresser (see pictures of the store bought crib and dresser below). I drew up some plans in the free version of SketchUp and got to&hellip;
                ]]>
            </summary>
        <content type="html">
            <![CDATA[
                    <p><img src="https://austinhanson.com/media/posts/14/IMG_9249-1.JPG" class="type:primaryImage" alt="" /></p>
                <p>So we're expecting a baby here in the next week or two and my wife wanted a shelf/armoire/ambry(?) thing that matched our crib and changing dresser (see pictures of the store bought crib and dresser below). I drew up some plans in the free version of <a href="https://www.sketchup.com/">SketchUp</a> and got to work.</p><figure class="kg-card kg-image-card"><figure class="post__image kg-image"><img src="https://austinhanson.com/media/posts/14/Baby-Shelf-Plans-Complete.png"  alt loading="lazy" width="624" height="486" sizes="(max-width: 1200px) 100vw, 1200px" srcset="https://austinhanson.com/media/posts/14/responsive/Baby-Shelf-Plans-Complete-xs.png 300w ,https://austinhanson.com/media/posts/14/responsive/Baby-Shelf-Plans-Complete-sm.png 480w ,https://austinhanson.com/media/posts/14/responsive/Baby-Shelf-Plans-Complete-md.png 749w ,https://austinhanson.com/media/posts/14/responsive/Baby-Shelf-Plans-Complete-xl.png 1200w"></figure></figure><p>I happened to have a fair amount of S3S birch lumber lying around (waiting to be turned into cabinets and a vanity for in our basement) so I picked a few decent boards from the pile. I knocked off the end pieces to avoid end splitting, cut the lumber down to rough size, and then jointed and planed them down to size.</p><p>I tackled the side panels first. They were just lap joined birch rails and stiles with a rabbet cut inside and a 3/4" birch panel with a rabbet fitting in the middle. The hardwood was left at around 7/8" to leave a small indentation on the outer side to match the same indentation on the changing dresser.</p><figure class="kg-card kg-image-card"><figure class="post__image kg-image"><img src="https://austinhanson.com/media/posts/14/IMG_5128.JPG"  alt loading="lazy" width="2000" height="2667" sizes="(max-width: 1200px) 100vw, 1200px" srcset="https://austinhanson.com/media/posts/14/responsive/IMG_5128-xs.JPG 300w ,https://austinhanson.com/media/posts/14/responsive/IMG_5128-sm.JPG 480w ,https://austinhanson.com/media/posts/14/responsive/IMG_5128-md.JPG 749w ,https://austinhanson.com/media/posts/14/responsive/IMG_5128-xl.JPG 1200w"></figure></figure><p>For the legs I traced one of the dresser's legs onto cardboard and used that to cut out the rough shape in birch. I cleaned up the first leg and then used a flush trim bit and the leg as a template to cut out the other three legs.</p><p>For attaching the legs to the panels I used five 1/4" dowels spread evenly down the stiles on each side of the panel, so five dowels on each side of the panel. Finally, before gluing the panels together, I also used the drill press to pre-drill holes for where dowels would be used to attach the top - two dowels on each side panel.</p><figure class="kg-card kg-image-card"><figure class="post__image kg-image"><img src="https://austinhanson.com/media/posts/14/IMG_5144.JPG"  alt loading="lazy" width="2000" height="2667" sizes="(max-width: 1200px) 100vw, 1200px" srcset="https://austinhanson.com/media/posts/14/responsive/IMG_5144-xs.JPG 300w ,https://austinhanson.com/media/posts/14/responsive/IMG_5144-sm.JPG 480w ,https://austinhanson.com/media/posts/14/responsive/IMG_5144-md.JPG 749w ,https://austinhanson.com/media/posts/14/responsive/IMG_5144-xl.JPG 1200w"></figure></figure><p>After the panels were done I laminated boards together to make the top. I made some quick cauls out of some 2x4s and used some fancy <a href="https://www.rockler.com/rockler-sure-foot-aluminum-bar-clamp-set-24-and-48">clamps from Rockler</a> (seen above) specific to the task. This was the first lamination I've ever really done. Were I to do it again (which I am in building a small shoe bench), I'd use biscuits or loose tenon joiner in the middle.</p><figure class="kg-card kg-image-card"><figure class="post__image kg-image"><img src="https://austinhanson.com/media/posts/14/IMG_5138.JPG"  alt loading="lazy" width="2000" height="1500" sizes="(max-width: 1200px) 100vw, 1200px" srcset="https://austinhanson.com/media/posts/14/responsive/IMG_5138-xs.JPG 300w ,https://austinhanson.com/media/posts/14/responsive/IMG_5138-sm.JPG 480w ,https://austinhanson.com/media/posts/14/responsive/IMG_5138-md.JPG 749w ,https://austinhanson.com/media/posts/14/responsive/IMG_5138-xl.JPG 1200w"></figure></figure><p>The shelving was all cut from 3/4" birch. My local home store doesn't carry baltic birch on hand so it's just 2-sided cabinet quality birch. In the future I'll probably just mass order a bunch of baltic birch just so I have some for projects like this. I cut dados in the horizontal shelves for the vertical shelves to all slide in.</p><p>At this point my wife handled the sanding. It was a lot of sanding and the top took a little extra care to make sure it stayed flat.</p><p>Gluing it all together was "exciting". I got the panels and shelves all glued together except for the top vertical divider. Once the first assembly had dried for an hour I marked locations for dowels from the top of the two side panels and the top vertical divider onto the bottom of the top. I drilled holes for those dowels, checked the fit, and then glued the divider and top onto the rest of the assembly.</p><figure class="kg-card kg-image-card"><figure class="post__image kg-image"><img src="https://austinhanson.com/media/posts/14/IMG_9193_2.png"  alt loading="lazy" width="2000" height="1500" sizes="(max-width: 1200px) 100vw, 1200px" srcset="https://austinhanson.com/media/posts/14/responsive/IMG_9193_2-xs.png 300w ,https://austinhanson.com/media/posts/14/responsive/IMG_9193_2-sm.png 480w ,https://austinhanson.com/media/posts/14/responsive/IMG_9193_2-md.png 749w ,https://austinhanson.com/media/posts/14/responsive/IMG_9193_2-xl.png 1200w"></figure></figure><p>Afterwards, we found a stain we liked, and applied two coats of it, and then two coats of water-based polyurethane.</p><figure class="kg-card kg-image-card"><figure class="post__image kg-image"><img src="https://austinhanson.com/media/posts/14/IMG_9249.JPG"  alt loading="lazy" width="2000" height="1500" sizes="(max-width: 1200px) 100vw, 1200px" srcset="https://austinhanson.com/media/posts/14/responsive/IMG_9249-xs.JPG 300w ,https://austinhanson.com/media/posts/14/responsive/IMG_9249-sm.JPG 480w ,https://austinhanson.com/media/posts/14/responsive/IMG_9249-md.JPG 749w ,https://austinhanson.com/media/posts/14/responsive/IMG_9249-xl.JPG 1200w"></figure></figure>
            ]]>
        </content>
    </entry>
</feed>